If you had only known
There is nothing quite as disheartening as watching transplanted seedlings die in your spring garden. If you grew them from seed yourself, it is even sadder. You can avoid this tragedy by knowing how to do a few simple things.
- determine if you have a healthy seedling
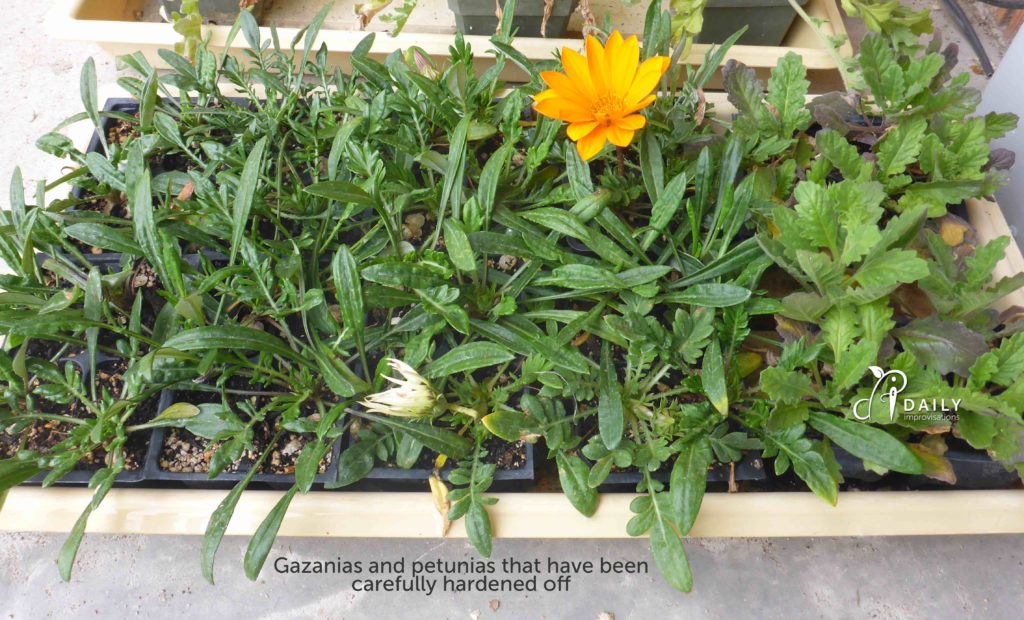
- make sure the seedling is hardened off
- stimulate the roots
- avoid injuring the main stem
- plant at the correct depth
- choose the correct growing environment
- give enough room for growth
- sacrifice a few blossoms
- prune foliage to match available roots
- water appropriately through the transition
- watch for pests
- would it be better to directly plant the seeds outdoors
Here is a short video overview of these things. Read below for more detail.
I suggest you read all the way through before doing anything to your seedlings so that you get the full picture and can make all the ideas work together.
Determine if you have a healthy seedling
If you are purchasing your seedlings, avoid those with yellowed leaves. This is likely a sign of overwatering and the roots may be rotting. Also avoid overgrown plants that seem to be fighting for space and growing spindly.
Try to visually isolate the plants so that you get a good idea of what one plant looks like. Sometimes all the plants growing so closely in a pack give an appearance of robustness that they don’t have. Look for good green color, a strong stem, and sturdy branching.
If you grew your own seedlings, plant the best looking ones first. Save any runts for available space or just give them to the chickens.
Make sure the seedling is hardened off
Even if you buy your seedling from a stand sitting in the sun, it can be hard to know if that is it’s first day out in the real world of sun and wind. If it was living under any sort of cover at the store, it might expire if planted right out in direct sunlight.
Even if it was verifiably hardened off by the seller, if you keep it protected for a few days, such as inside by a window, you will want to harden it off again. There is not enough direct sunlight from the window and the leaves change to collect as much light as they can. This makes them vulnerable to getting burned when put back outside.
If you would like more guidelines for carefully hardening off you plants check out How to Harden Off Your Seedlings Before Planting Them Outside.
Stimulate the roots
Most seedling roots have adapted to being in a container. Unless they get a little roughing up, they may very well continue to think they are in a container, stunting future growth. Rubbing the edges and bottom of the roots is all that usually needs to be done. But don’t do it enough to knock all the soil away.
If the root mass is very dense, it may need more extensive friction. Some people use scissors or clippers to cut into the tangle in a few diverse places, but not too deep. The idea is to send the message that there is life outside the former mold.
Avoid injuring the main stem
While transplanting, avoid holding the plant by the main stem. If it breaks, there is no going back. Instead, support the seedling by the soil/roots. You can also use the leaves some to manage the plant. This article I wrote about transplanting cosmos flowers gives more details on how to do this.
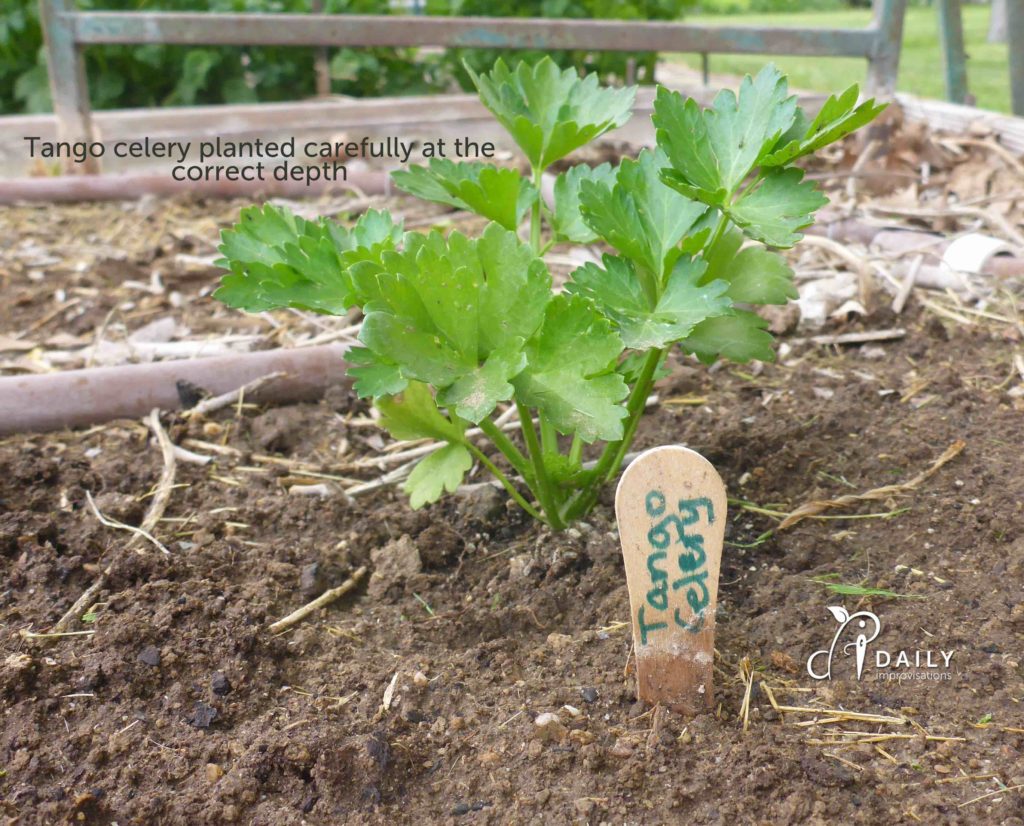
Plant at the correct depth
There are 3 things to be aware of regarding planting depth:
- Does it matter for that seedling?
- Is the stem still at the correct level compared to the soil?
- Is the soil surrounding the roots the same level as the rest of the soil?
For some plants, such as tomatoes, the exact depth of planting doesn’t matter. In fact, tomato plants sometimes benefit from being planted a bit deeper than they were in the original pot.
However, other plants really need to have their stem-to-roots juncture be at the soil-to-air level. For these plants be careful not to pat too much soil up under the seedling, but also be aware if too much soil as fallen away from the roots and it needs some reinforcements.
Another thing to keep an eye on is whether or not the soil around the newly transplanted seedling is settling down too far. Besides stressing the plant if the roots are exposed, you could end up with the soil that was around the seedling being higher than the soil past that. This could inhibit proper growth.
If you don’t know, it is best to err on the side of planting at the same level as the seedling was in the pot.
Choose the correct growing environment
No matter how careful you are with everything else, if the seedling likes full sun, but you plant it where it gets a lot of afternoon sun, it won’t be happy. The correct growing environment can include things like exposure to sun throughout the day, top watering versus drip irrigation, or not providing a trellis for a vining plant.
But before you can even think about whether or not it will get enough sun, you have to know if it is the right season. Some plants simply do not survive cold temperatures. Some are ruined by warm ones, due to bolting to seed or getting bitter. Here is my recent discussion of understanding average last frost dates for your area: Understanding Your Average Last Spring Frost Date
Give enough room for growth
Everything looks so small when it is first planted! It will stay small if it doesn’t have room to grow. This is why weeding is a thing. It is why coming to terms with thinning is important. To read more about how to evaluate thinning and do it effectively, I suggest Why, When, and How to Thin Plants in the Garden.
Sacrifice a few blossoms
Not only does making flowers take energy from a plants growth, but it is a sign that a plant is moving on to another stage of growth. If you want to keep the seedling to direct more energy into getting established at its new location, pinch or cut off any buds or blossoms. More will grow.
Prune foliage to match available roots
Occasionally you will end up with a seedling that has more top foliage than roots. The general rule of thumb is that the roots and foliage should match in size for transplanting. If a lot of roots have been sacrificed in the transplanting process, you should consider pruning back the foliage so that the seedling isn’t stressed.
This will depend a lot on the size of the seedling. For a small plant, the ratio is going to be negligible and there probably isn’t enough top foliage to prune. For a larger plant, some pruning can be a helpful intervention.
Water appropriately through the transition
First, it is usually a good idea to give seedings a good watering a couple of hours before transplanting them. Even the most careful transplanting is going to interrupt a plant’s ability to take up water and nutrients. You want the seedlings to be under as little stress as possible before transplanting.
Secondly, the watering needs are going to vary over the couple of weeks after transplanting. Initially, the soil needs to be watered to help the seedling make optimal contact with the soil. Also, the roots are still very limited at first and will need more regular water, like a newborn baby needs to be fed more often. Still, don’t over water and create a bog. That will make the roots rot. Make sure the soil is getting fairly dry, but not rock hard or powdery between waterings.
Watch for pests
New seedlings are easily wiped out by pests. The seedlings are small, juicy, and tender. If a pest problem is not noticed immediately, your plants may disappear. Look under the leaves. Watch for holes or discoloration. Notice if there is digging around them. You can’t take care of what you don’t know is going on.
Would it be better to directly plant the seeds outdoors
Some seedlings just grow better if directly planted outside. This will depend some on your climate. I find that in my area things like beans, corn, peas, and lettuce do much better with direct planting.
Some seedlings grow so fast in pots that it is hard to get them transplanted before they are stressed or leggy. I tried growing zucchini in pots once. Just once.
Some seedlings just don’t transplant well. Any plant that has one single main root can be hard to transplant without too much shock. I find onions and leeks to be an exception to this.
So now you know
With a little practice, these things will become second nature. Meanwhile, I will work on getting a printable checklist ready for those who have signed up for my Improvise This newsletter! If you think there is anything else that should be added to the list, please let me know. ????


