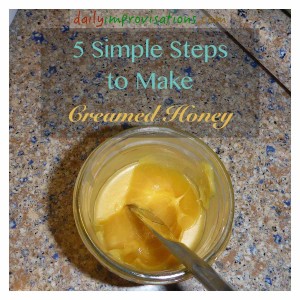
I don’t remember when I first purchased some creamed honey. I’m pretty sure it is not something I got as a child, though. It would have been too expensive. And I’m pretty sure I bought it as an adult because it had the word “creamed” in the description. I thought there was some large, powerful mixer that whipped it into a semi-solid froth. I would buy it as a treat for myself once in a while, because it was kind of expensive and I ate it up quickly when I had it.
Then, about a month ago, I began to eat it on a very regular basis for breakfast on toasted homemade bread. Something had to be done, and, for the first time, it occurred to me to look up how such honey might be made.
There is nothing “creamed” about creamed honey at all, except for the color; and possibly the texture to some extent. It is made by controlling the crystallization process. Specifically, the crystals in creamed honey are very small, giving it that smoothness in both taste and spreading. There are two basic ways this particular crystal formation of honey can be obtained.
– The liquid honey can be stirred thoroughly every day until it begins to harden appropriately. This is the time consuming, somewhat labor intensive way.
– The liquid honey can be primed with some previously “creamed” honey, and left to crystallize according to the introduced crystal pattern.
But would it work for me? I had a gallon of crunchy-soft raw honey in my pantry. It would be so lovely to turn it into a gallon of creamed honey. I read several blogs, plus homesteading types of books I have, and melded it all into these simple steps:
1. Put the honey in a pot that leaves enough room to stir without complications. Turn on low, low heat to liquify any crystals. Heating it very much will destroy many of the beneficial qualities of raw honey. High heat will have a bad effect onthe taste of any honey. I never measured how hot it was, just kept it as low as my gas stove would allow.
2. Stir the honey once in a while, trying to rub any crystals away from the edge of the pot. I had to turn it off and leave it once for about an hour, then came back and it had started to go back to the wrong crystals again, but a little more heating took care of that. In all, it took no more than 2 hours of gentle heating for me this time, but each time it will undoubtedly depend greatly on how crystallized it is to begin with.
3. Once liquified, I poured the honey all into a 25 cup Tupperware bowl that had a working snap-on lid. I did not scrap the pot, as I was concerned that the few crystals still attached there would work against the desired process. With the lid of the large bowl securely snapped on, I put the bowl of honey in the chest freezer for about an hour. The idea was to cool it to room temperature before it could begin to crystallize. I checked on it every 15 minutes or so, and took that opportunity to slosh it around in the bowl to bring anything in the hot center more to the outside.
4. With it judged adequately cool, that is, very close to room temperature and cool enough that it would not melt the “creamed” crystals, I added the approximately 1 cup of creamed honey that I had left in the house. There is no exact proportion needed. Less is more cost effective, but might take longer to crystallize. It was a little nerve wracking stirring it in, as it seemed to mix too easily, but I mixed it till it was almost of uniform color. It looked like liquid, spun gold with swirls of melted pearls until it began to look like soft, shiny caramel.
5. I had 9 clean wide mouth pint jars and plastic lids ready. I poured the honey into the jars and put all but one of them into the basement pantry, where the temperature is consistently close to 62°F. Then, I made some toast and tried some of the already solidifying honey on it, after a layer of real butter. The honey was already showing promising signs of turning a lighter color and thickening into the velvety texture.
Three days later, it is still turning whiter! I have been eating out the the one jar, noticing how the taste gets milder with each day. Even if it doesn’t get as completely white as the original creamed honey, I am quite satisfied, and know I will greatly enjoy all of those jars. If it does get completely light, I will have to save some to seed my next batch.
See my youtube slideshow presentation here:
