I have been reading and reading about adjusting patterns. Over the 40some years I have been sewing, I have figured out things like the shoulders, the rise in pants, the hips; but adjusting the bust has been more of a challenge. Or at least, I was more impatient with it because it seemed like it took so many steps.

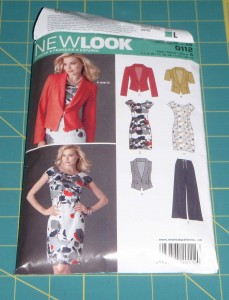
Finally, I buckled down to make this New Look dress pattern 0112 truly fit me across the bust. One of the reasons I chose it is that it had raglan sleeves, which I thought would make the whole silhouette softer. It should also make fitting my somewhat wide shoulders easier. I decided my “muslin” would be out of a cotton Hawaiian fabric I had purchased on our trip to Maui. If it worked, the final product would be fun to wear. If it didn’t, I could use it to line purses.
It seems like all of the resources I had had a lot to say about changing a bust dart to make the bodice larger. The steps to make it smaller were often like “do just the opposite” or otherwise abbreviated. Somewhere along the line, I understood that the other main step would be shortening the front piece of the garment. Maybe it just took me a long time to absorb this information because all my life I’ve been having to add length to things.

But I didn’t really understand this until I went ahead and made the darts smaller. That is, I kept the same bust point, but started the outside line on both sides of the dart about 1/4 inch to the inside of the original dart. Then, I tested how the front and back matched. I pined from the underarm down just below the dart first. Next, I pinned from the hem end up to just under the dart. I found there was about 1/2 inch of fabric too much in the front of the dress now.
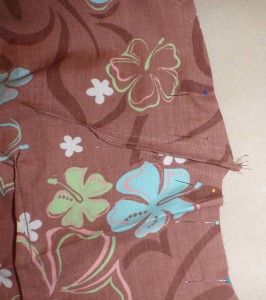
It occurred to me that many similar dresses have a seam to piece the upper bodice to the lower part of the dress in just this spot. If I just sewed a straight line to take in the excess, about an inch below the side point of the dart, it would probably look like it was meant to be that way.

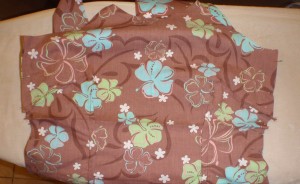
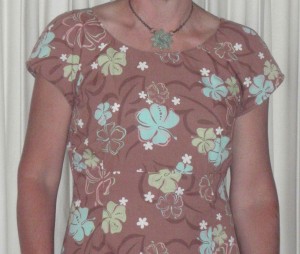
With the pins holding everything else in alignment, I pressed the fold in as straight as I could. Then, I pinned it and sewed. The result looked promising when I held just the dress front up to me, but I needed to sew the back to the front to know for sure. When this was done, it fit me just right. (click on any photo to enlarge)

The rest of the sewing went according to directions, except for minor variations like covering the top of the zipper with the facing, instead of folding it over the top of the back seam, which I thought would look tacky. I also finished the hem with a basic 1/4 inch double fold and top stitch. I didn’t even try it on to see where it would be, but all the pieces had lined up very well during sewing, so there was little risk.

I like this pattern a lot. And now, if I get around to making it out of other fancier fabrics, I know how to adjust the front pattern piece before I cut. I just need to make a note on both the pattern piece and the sewing instructions so that I don’t forget! I think this was a good pattern to use to learn what I needed to do in a way that will be easy to apply to other patterns, too. Maybe for the first time in my life, I will have tailored, crisp garments than fit me in the bust!
