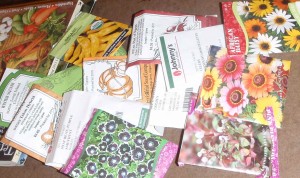
It is tempting to just buy new seed every year, rather than risk having all your soil preparation and weeding be for naught because the seeds don’t sprout. Yet, it is also very difficult to throw away the older dated seeds. One way to deal with the dilemma is to assume a lower rate of germination, then compensate for it by sowing the seed more thickly than normal for fresh seed. Another approach is to test the germination potential of the seeds before they ever make it to the ground.
This year, I decided to test germination prior to planting. It sounded overwhelming, since I have a LOT of older seeds. Partly, I was having trouble choosing how many and which ones to test. My son and daughter-in-law helped with the sorting, motivated by being able to also use seed that proved viable.
Next, we set up an assembly line at the kitchen table. My son labeled plastic sandwich baggies with a permanent marker, then put those alongside the specific seed packet in a queue for me. I had a mixing bowl with water in it, and a stack of half paper towels.
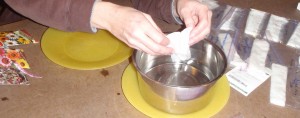
I dipped each section of paper towel into the water so that is was soggy, but not profusely dripping. I laid it on a plate, then sprinkled a few seeds from the packet onto one end of the wet towel. If there were not very many seeds left, I didn’t test very many. If there were plenty, I opted for a more statistically representative sample.
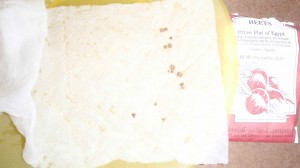
Once the seeds were on the towel, I rolled it up in flat sections, about 1.5 inches wide. This will make it less troublesome to unroll the towel later to check on the seeds. The squishy package was slipped into a baggy, double checking to make sure I had the bag that was labeled for those seeds. When the top was closed, I gave the whole thing a few gentle squeezes to make sure the seeds were getting in contact with the moisture as soon as possible.
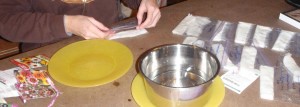
All of the filled baggies fit nicely into one of my sturdy garden trays. Laid out in one layer, they were placed in my warming cupboard (any warm spot will do, such as on top of the refrigerator, dryer, or water heater). It will be dark in the cupboard, but that is not important.
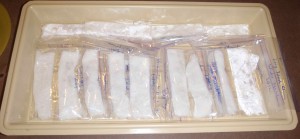
After about 3 days, I will begin checking on the seeds once a day. I don’t need to worry about getting them to a light source, like I would if I was going to continue growing them in pots, so if they get leggy it’s okay. Many of them are small enough that I will have to unroll the towel to see them. Some of the larger ones, like bean or squash seeds, might show through the towel.
If the towel needs any more moisture at that time, I will mist it. If there is a little mildew, it won’t matter. No one is eating these. I need to maintain the moisture just long enough for them to sprout. This is the same system that I used for checking the viability of seeds I saved last fall.
The results should all be in for the vegetable seeds in about a week to 10 days. The flower seeds will probably take longer, up to 3 weeks. I will either write the results on the seed packets, or throw them away (if nothing sprouted). When planting time comes, we will have a much better idea of how to proceed.
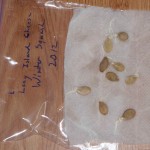
Three days later all of these older seeds were germinating at high rates:
- 2012 Long Island Cheese winter squash: 8 of 9 seeds
- 2011 Royal Burgundy: 11 of 11 seeds and 2011 Purple Amethyst: 8 of 8 sees, both bush beans
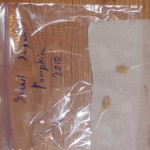
- 2010 Small Sugar pumpkin: 2 of 2 seeds
- 2010 Painted Daisy: approximately 95%
- 2011 Flat of Egypt beet: 12 of 15 seeds, and 2010 Specialty Golden beet: approximately 90%
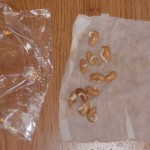
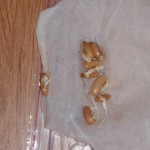
One week later these seeds were showing reasonable signs of life:
- 2011 Talon onions
- 2010 African daisies
- 2010 Pink Pinheads (flowers)
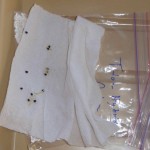
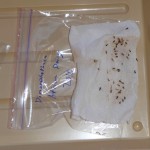
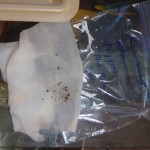
- The 2011 Burpee Hot Lemon pepper didn’t sprout at all, which might explain why I only got one plant the first year I tried it. It also may have been too wet in the paper towel, although the other seeds that like it comparatively dry to sprout (i.e. squash and pumpkin) sprouted just fine during the germination tests.
- Neither did I get results from the Penny Black flower seed. I may not have been patient enough since it says 7 -21 days until sprouting.
- The pelleted celery seed remained unmoved.
So, you can see this test method worked and we know which seeds we can confidently plant this spring. It was time well spent.
