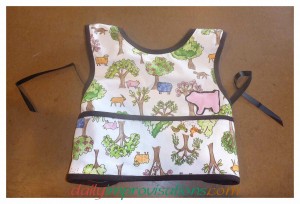
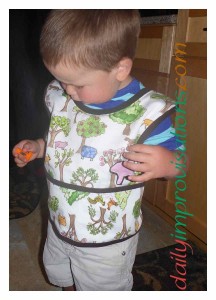
I had a special request to make my grandson a complete body bib. ha ha ha. Still, I came up with a version of the DIY T-shirt neck bib that seems to have satisfied all parties involved. The grandson likes the appliqued pig on the farm animal fabric. His parents like the full frontal coverage supplemented by wrap around sides and a deep pocket to help avoid some floor-level distribution. (click on any photo to enlarge)
To make this bib, I used the basic t-shirt lining with the neck ribbing left in place. But I had to make another pattern first. This was partly because the grandson is larger (at 2 years old) than his petite sub-one year old sister and cousin. I also did not see the point in making the pocket wrap all the way around with the lower flaps. Thus, I needed to come up with an alternative method of attaching it.
The measurements I got showed that the grandson’s head was about 3 inches larger in circumference than the little girls. So, it was back to doing algebra. The adult t-shirt neck would be the same size, and since it fits over an adult head, it would fit over his. However, I needed to make sure the neck hole out of the woven fabric was large enough so that the neck ribbing could still stretch sufficiently. At this time, I had not realized I had used the wrong mathematical formula for the first bib pattern, and mechanically used it for this bib, too. The radius of an 18 inch and a 21 inch circle only vary by 0.2 inches, when using the formula for area instead of circumference….when meant such adjustments were not overwhelming to design. Oops. The neck hole was still comfortable to get over the 2 year old grandson’s head, so I guess I can now join the ranks of famous inventors who make discoveries due to mistakes….
I cut the main body of the bib front pattern to lay all the way down to his lap, but still hopefully not fold in a way that closed the pocket. The shoulders were wider, too. The flaps were estimated to be just enough to go around his sides and be able to have ties reach in the back, behind him.
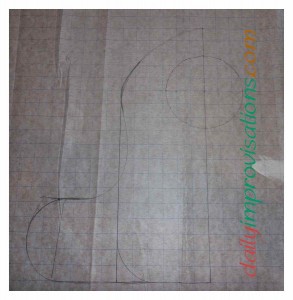
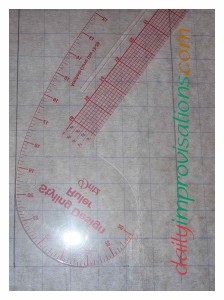
To be able to cut out the bib t-shirt lining, I cut apart the t-shirt the same as before. That is, I cut straight up the sides of the t-shrit to the arm holes, cut around the armholes, and left the shoulders and neck ribbing INTACT.
As previous bibs, laying out the pattern on the slightly curvy t-shirt shoulders and neck area took so finagling. See here for how I work with cutting out the bib patterns on a less than flat t-shirt section. I was careful to only cut parts of the t-shirt I needed to for the bib neck and lining because I had the idea of using the t-shirt knit to make the edge binding.
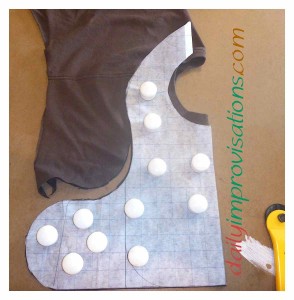
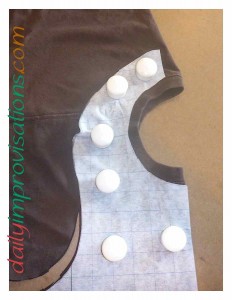
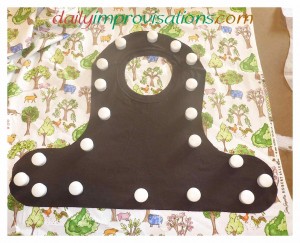
I went ahead and made this binding now because I would use it on the top of the pocket. I cut bias strips of the knit in 1.5 inchs widths. This gave me about 1/2 inch for 1/4 inch allowance on each long side, and the rest to fold over the seam allowance for a 1/2 inch border.
I had measured the outer perimeter of the bib to know how much I would need, and added the length of the top of the pocket. This total length required just a few inches more than two bias (diagonal) strips from the large men’s t-shirt (thanks, Uncle Jesse) that I was using. I sewed the ends of the bias strips together to make one long piece for the main part of the bib. Some instructions for making bias tape say to cut the adjoining ends in diagonals. This may be important for woven fabric, but I did not do it for the knit binding and it worked fine. Much easier to sew them together when the ends are just flat. The pocket top, of course, just needed a few inches and could be kept separate.
A piece of the main fabric was cut in a rectangle that would fit just at the bottom front of the pocket. I simply folded the bib pattern at the points where I wanted the corner of the pocket to sit and used that for a cutting guide. I would need to finish the side edges differently than on the other bibs, where they had been included in however I finished the overall edges of the bibs. The bottom of this new pocket design would still be caught up in the bib binding.
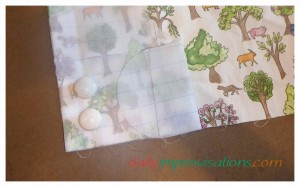
This time, I did not line the pocket, but I did make sure there are no raw edges in it. I hate strings in pockets after a couple of washings! To accomplish, I double folded the side ends of the bib pocket and pressed them in place. With these side hems opened up, I sewed the t-shirt bias binding to the right side of the pocket piece, right sides together. Then, without bothering to hem or finish the other edge of the binding, I turned the binding to the wrong side of the pocket, using the seam allowance as a guide for leaving a border of knit showing. It is kind of like using the seam allowance as a flat piping.
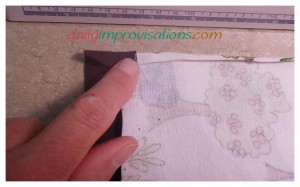
I experimented with sewing the remaining edge of the binding down by sewing on the wrong side of the pocket and feeling for the seam with my fingers. I wanted to keep the stitching on the main fabric since the thread matched its white back ground much better than the brown knit. Note: This worked for the pocket, but when it came time for that step on the main body of the bib, I sewed from the front side, in order to keep better track of my stitching around the curves. I also had make sure to stretch the binding under enough to catch it as I sewed the curves. Most of the way this worked well. I had to go back over a couple of small spot on curves to catch an edge of binding that had not gotten pulled quite far enough.
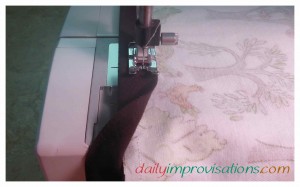
But, back to the pocket. Once the binding was on the top of the pocket, I folded the side hems back in place and pinned the pocket to the bottom front of the bib, centered, and topstitched the sides down onto the front of the bib main fabric. I discovered belatedly that I had sewn the pocket on with the fabric print upsidedown compared to the rest of the bib. I decided that it was just fine is the grandson could see some of the happy farm animals and fruit trees right side up while looking down at them and left it that way.
Now it was time to sew the neck hole openings together. Making sure the t-shirt ribbing was tucked under the t-shirt knit out of sight, so that it would pop into place when the bib was turned right side out, I pinned the neck edges together. I tried to sew, with the standard narrow zigzag stitch for sewing with the knits for these bibs, about a 1/4 inch seam, right about where the ribbing was already sewn to the t-shirt originally.
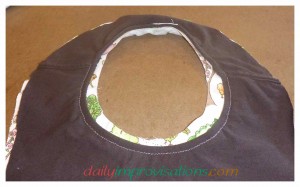
This is a good time to mention that I’m not sure it really did me much good to cut out the neck hole from the main fabric before. It may have been easier to trim the neck hole to size after sewing the neck ribbing on, but by the time I partially and TEMPORARILY pinned the bib to the bib lining to align the neck holes, then manipulated the t-shirt neck ribbing to lay in a flat circle, the neck hole opening was about an inch more in diameter than I had cut. This does make up for my faulty math at the beginning, but could depend on the original neck opening size, so you might want to do better math than me.
When the t-shirt knit was pulled through the neck (after the temporary pins were removed), so that the neck hole seam is sandwiched between the bib layers and the right sides of the fabrics are facing out, all was as I had hoped. The next step was to pin the outer edges of the bib main fabric and bib knit lining together. They did not match exactly, but they were very close. I basted the edges together, then trimmed where needed to make the edges even.
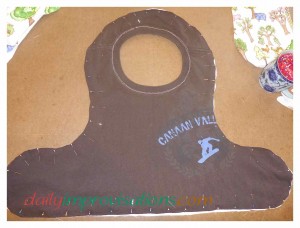
To sew the bias knit binding around the outer edge of the main bib, I did not bother pinning first. I just made sure I was sewing the right side of the binding (based more on the seams holding the strips together, because I could not see that it made a difference for the t-shirt fabric itself) to the right side of the main colorful bib fabric. I began at the back edge, up behind the neck opening, and left that first end flat (to be covered with a folded end of the bias strip when I finished making it all the way around).
With the raw edges even, I again used a narrow zigzag stitch. I stretched the binding as much as needed to make it neatly around the curves. This is still easier, in my opinion, than trying to work binding or hemming around square corners. Hence, the edges of my bibs are all curved. When I could tell how much I needed to overlap the ends, with a scant 1/4 inch folded under on the finishing end, I trimmed the bias strip. The fold should be facing you at this point, so that when the binding is turned under, it is hidden.
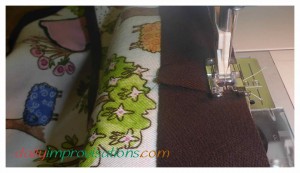
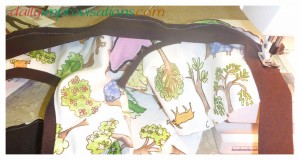
The seam allowances were again used at my guide and “flat piping,” of sorts. With the same narrow zigzag stitch, I sewed on the right side of the main fabric while making sure the bias binding was being held far enough over and under the sides to be caught in the stitching on the underside of the bib. As I mentioned, this was only a little trouble around curves. I was also careful not to make the seam allowances bunch up in the binding. The effect on the lining side of the bib was the chic “unfinished” look of some stylish t-shirts.
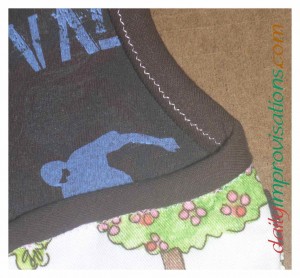
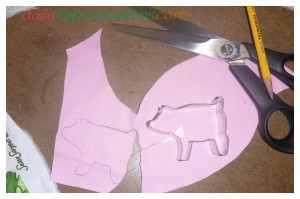
The pig applique’ seemed like it would stand out and coordinate better if I put it on a backing of the same dark brown knit used for the lining and binding. You can see that I still did the applique’ stitch around the edges of the pink, leaving the very narrow border of brown to give a bit of a 3-D affect. For review, I traced around the outside of the cookie cutter with a pencil. After it was cut out so that no pencil markings would be showing, I used a straight stitch to sew the shape onto the background. For the pig, I did this on the brown background before trimming the brown so closely to the pig shape. This avoids issues with the brown fabric being pulled up strangely by the thread. I pinned the applique’ into position on the bib front, then used a narrow, tight zigzag to go around the edges of the pig, using the straight stitch as a guide. Without that straight stitch there, it is hard to keep track of where to sew with part of the pig hidden under the presser foot. By the way, my pig is cut out of pink PUL fabric.
Not being in the mood to spend a lot of time on ties, that would rarely be seen, I found some dark, 1/2 inch twill tape. I estimated how much would be needed to tie a secure bow. Tucking about 1/4 inch under, I stitched and double stitched the twill tape pieces, one to the end of each flap. I trimmed the end diagonally to hopefully fend off unraveling. I will wait to hear how this works and fix it if needed. I would have used some gross grain ribbon and hemmed the ends, but I didn’t have any of an appropriate color.
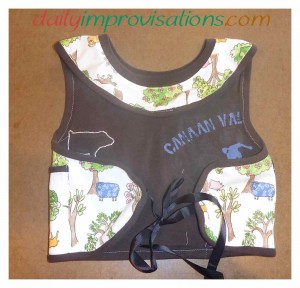
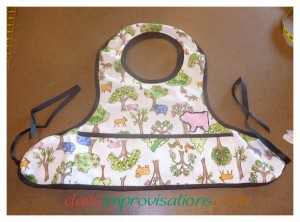
There you have it. The Big Boy, Wrap Around T-shirt Neck Bib, with pig applique’ and handy pocket. When we showed it to my grandson, he was very excited to recognize the pig. He let us put it on him, but then got right busy arranging the magnetic letters on the refrigerator. This made us think that it could be a regular “work” bib! He can use it for helping with the dishes (which he currently loves) and or other messy, big boy work.

Leave a Reply