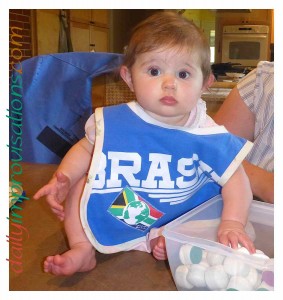
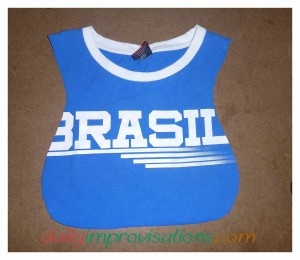
For the next t-shirt neck baby bib, I wanted to use the actual t-shirt as the lining. I wondered if it might me easier to have the neck ribbing already sewn in, and fun to use some of the designs on the t-shirt. I was going to be using a heavier apron fabric remnant, so there shouldn’t be the same need for a moisture proof lining. If you are interested in reading how I made my bib pattern, click here. (click on any photo to enlarge)
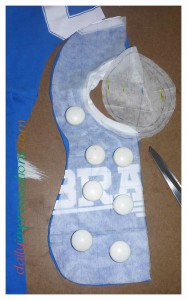
1. To begin, I cut the main body of the t-shirt away from the sleeves and open at the sides, leaving the neck intact, of course. This allowed me to fold it in half, all the way from the front to the back of the t-shirt, in one long piece.
2. But before I cut it, I compared the neck ribbing to my bib pattern neck circle. It seemed to be very close to the same circumference.
3. Now, I laid the bib pattern down on the folded t-shirt fabric. The curves of the ribbing and the angles of the shoulder made it so that the fabric didn’t want to lay exactly flat all at once, but it was close enough to work with. I cut out the front first, and most carefully; then, I slightly rearrange the back fabric to be able to cut it.
4. Next, I cut out the main apron remnant fabric, including a pocket. I made sure that the stripes on the pocket would align with the stripes on the bib front where it would be.
5. I measured some homemade bias tape that I had made to sew the apron and was happy to find it was more than enough to edge the bib and the pocket. (See notes on PUL Lined Bib Model in the link above about how much bias tape I needed)
6. After some brainstorming, I decided to try attaching the main fabric of the bib to the t-shirt lining at the neck opening. It took a bit of trial and error, but I figured out that I needed to pin the outer edges of the bib to help hold things in place. Then, I folded the neck ribbing under the t-shirt at the seam edge where the two were attached. This meant that the ribbing would end up exposed instead of just trapped in the seam. I pinned the t-shirt and ribbing to the main fabric implied neck hole location, adjusting the ribbing to be as open as possible. I sewed the seam of the ribbing and t-shirt to the main fabric using a medium small zigzag seam.
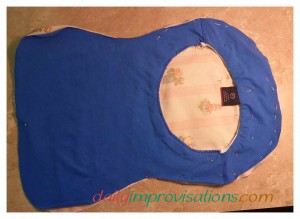
7. To see if it really worked, I had to cut the center out of the neck location of the main fabric, and then flip the t-shirt lining through the hole and to the other side. It was successful!
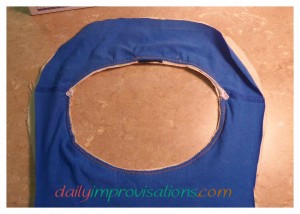
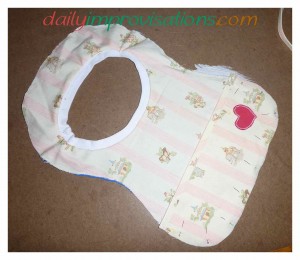
8. It was time to baste the outer edges of the bib main fabric and t-shirt lining fabric together. As I did for the previous bib, I kept this stitching close to the edge, about 1/8 to 1/4 inch from the edge, so that it would be easy to hide under the bias tape edging. Just in case anyone else runs up against it, I’ll mention that the design on the t-shirt was of pretty thick plastic “ink”, or whatever they use. The point is that it simply would not feed under my presser foot on the sewing machine. When I came to a part of the edge where I had to sew over that, I had to lift the presser foot and move the fabric forward for every stitch. Since this was just basting, I wasn’t too bothered by how it would look when I was done. If it had been topstitching, it would have been much more of a headache to get it to look even and nice.
9. Feeling more confident of my project, I made the pocket from the main fabric. I cut this pocket just a little deeper than I had for the last bib, maybe 1.5 inches deeper. I also put a little applique’ heart on it for a splash of color. I cut it from one of those old t-shirts I mentioned before. That kind of knit won’t tend to unravel, so I just did a straight stitch about 1/8 inch from the edge to hold it in place. I followed this with a closely placed (more stitches per inch), but fairly narrow zigzag around the edge.
10. Somewhere around this time, I noticed that the bib was going to lend itself to being reversible, so I started paying a little more attention to the t-shirt lining side. Before I put the pocket on the main (pink striped) fabric, I found a little colorful flag on the original t-shirt. I cut this out and appliqued it to the t-shirt side.
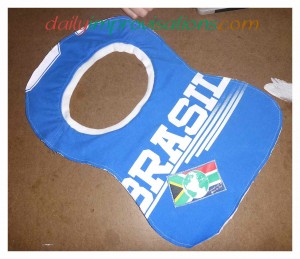
11. Basting the pocket to the main side, along the bottom and sides, was next.
12. Pinning the bias tape around the outer edge of the bib commenced, but I didn’t trim off any extra until I got almost to the final end of where I wanted to fold it under about 1/4 inch to cover the first raw.
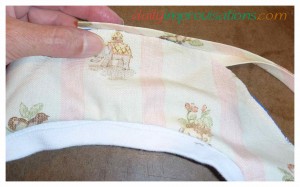
13. Ironing it seemed like a good idea and helped make it lay better. In a couple of places the main fabric folded up onto the ribbing a little higher than the seam. This was taken care of by the next step.
14. When the ironing was done, it looked like I could and should topstitch around the neck. This was done on the main fabric, in the seam allowance (NOT on the ribbing).
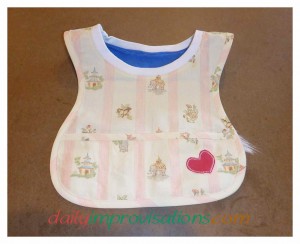
Ta-da! There is a second bib waiting to be tried on! As for evaluating this method versus the first one? They both have their pros and cons. I liked the ability to stretch the neck ribbing some in the first one. It was a more straightforward sewing step, too. However, it was nice to use the t-shirt for the reversible lining.
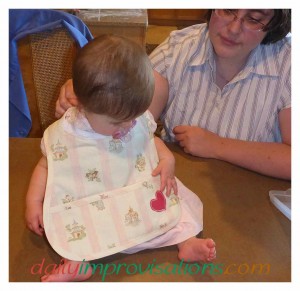
More variations coming soon –

Leave a Reply