I had asked to be told if my daughter needed anything in particular for their 6 month old girl, one of my grandbabies. The word came back: adjustable neck bibs. Because I was cutting up a race shirt t-shirt, it occurred to me that the ribbing from the neck just might be the thing! I asked for the circumference around the largest part of my granddaughter’s head. 18 inches. The inside edge of the ribbing measured just 18 inches, which meant it should fit quite comfortably, possibly being a bit big now, but having room to grow.
Thinking to save myself the effort of drawing a bib shape, I searched my stacks of baby patterns and some books. There was nothing there except the basic square shape. Still, it was fun to see everything. The closest thing to my idea were some simple instructions to use a (too small) guest towel. The neck hole they described still seemed a bit small, so I decided to design my own.
Other issues on my mind for a “basic” baby bib:
- thick enough or an underlining to repel spills from the day’s outfit
- long enough that things didn’t just dribble down it onto the lap
- a pocket to help keep the floor a little bit clean
- wide enough to cover the front of the baby without limiting use of arms
1. I laid out my pattern making paper, which can be purchased at any fabric store. It is light weight, semi-transparent, and has grid marks on it that help with sketching. You could also use any paper large enough, or even sheet of newspaper. With the newspaper, you just might want to be careful not to get the fabric smudged when cutting it out to shape.
2. I estimated how wide the bib should be to sit on the baby’s shoulders, since no baby was currently available. This was 10 inches.
3. I chose a point centered on that 10 inch line.
4. I did some algebra to determine the radius of a circle with an 18 inch circumference. It turns out I accidentally used the formula for area instead of circumference and got the number 2.4 inches. In retrospect, it seems to have worked quite well. If I had used the correct formula, I would have had to stretch the ribbing more to fit the main fabrics, but the neck hole is obviously quite large enough, so I will stick with my accidental numbers. Using this erroneous radius, I marked points at that distance from the midpoint, directly opposite each other.
5. I formed the ribbing, which was still in a whole circle, into as perfect of a circle as I could, keeping the most inner edge to the middle, and matching to opposite points of it with the points I had marked.
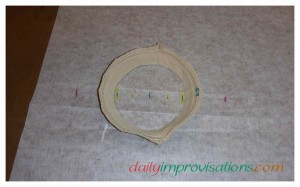
6. I sketched a circle using the inner edge as a guide.
7. I now sketched the outer edge of the neck ribbing.
8. Then I sketched a circle about 1/4 inch inside of that outer circle, to mark where I would actually cut the neck line. When I removed the ribbing, I could see that all three circles were basically concentric and centered.
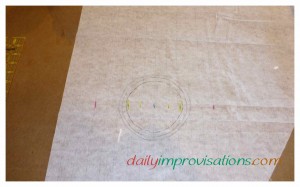
9. I concluded that the back portion of the bib only needed to be big enough to provide fabric for sewing in the neck ribbing, plus just enough of a flap to weight it to lay down. Thus, I drew it as a curve that extended it about 4.25 inched from the neck hole raw edge circle (the center circle).
10. I marked two points, each 11 inches down from the shoulder line.
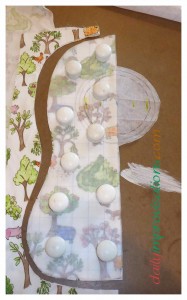
11. I thought that some minor curves would help accommodate arm movement, as well as make the front of the bib cuter. I drew the outer side edges of the bib so that it curved in some at approximate armhole level, then out again at belly level.
12. I marked a pocket line/guide at the widest section of the lower front of the bib.
13. I drew a line down the center of my bib pattern, so that I could cut it on folded fabric and have a greater chance of symmetry.
14. I cut out the “half” bib pattern piece, except for the neck circles, which I had an emotional attachment to. I had done algebra to design them, after all. I would figure out how to cut the fabric around that later.
15. I ironed some scrap apron fabric, left over from making the same daughter an apron.
16. Making sure that the one-way print was right side up, I placed my pattern weights on it and proceeded to use the rotary cutter to cut the outer edges. Since the neck hole was on the fold line, I could cut just half of the circle out, leaving the whole circle attached to the main pattern. This will make it easier to use it as a guideline for future bibs.
16b. I cut a pocket out to the dimensions of the bottom of the bib and up to the line I had marked, folding the rest of the bib pattern out of the way when I cut the top edge of the pocket.
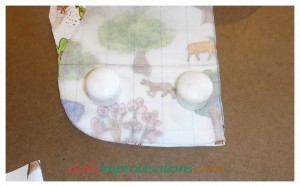
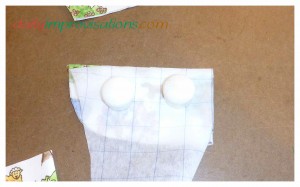
17. I found some scraps of PUL (polyurethane laminate) left over from some diaper covers that I have cut out, but, um, haven’t made yet.
18. I determined that I only needed the moisture proof PUL under the front part of the bib, so I would cut it such that it stopped at the shoulders.
19. I saw that I would have to piece the lining together, so I cut two halves, leaving 1/4 inch extra on the center part of each half so that the pieces could be flat seam sewed together.
20. I noticed that I had cut two right pieces of the PUL, but that was all I had, so I used one wrong side out. I pinned them together, using the main bib fabric as a guide, so that they would fit to the edges as closely as possible. Having the edges well aligned would make it easier to put the bias tape on the edges later.
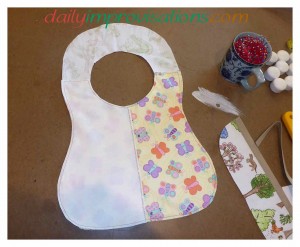
21. I pinned the newly created lining to the underside of the front of the bib, then sewed the edges together about 1/8 inch from the edge. I did this in one continuous seam, sewing over the ends that stopped at the shoulders to get to and from the front half of the neck line that also had the PUL right up under it.
22. I finished the top edge of the pocket with some double fold bias tape, making sure to have the half on the right side be the “shorter” side, so that it would be easier to catch the underside when sewing it in place. Pinning it in place helped here, but would be a more important step when working around the edges of the main bib.
23. I basted the lower edge of the pocket to the bottom edge of the bib.
24. After pinning the neck ribbing to mark it in equal fourths, I marked the neck hole in the main fabric the same way. Then, I aligned the raw edge of the neck hole to the raw edge of the neck ribbing, and pinned those four points. Now, I slightly stretched the neck ribbing to pin the rest of the neck edges together.
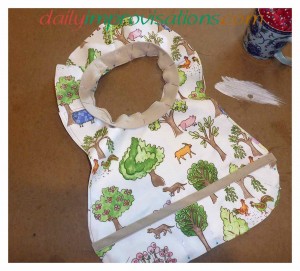
25. I sewed the ribbing to the fabric using a narrow zigzag stitch, keeping raw edges even and stretching the ribbing as necessary to make it fit.
26. A narrow zigzag stitch was used to topstitch the seam allowance onto the main fabric side. The zigzag stitching will make the neckline stitching less likely to tear if there is any pressure getting the bib on and off over the head.
27. I saw that I didn’t have quite enough of my scrap bias tape left to make it all the way around the outer edge of the bib, so I marked the midpoint of the bias tape and pinned it to the bottom of the bib. This meant that any patching I had to do would be at the back neck edge and symmetrical. If I made or purchased bias tape for a bib, I would need a solid 62 inches (or 1 and 3/4 yards).
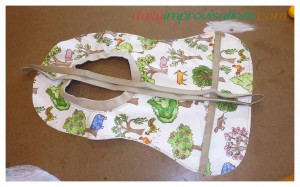
28. I applied the double fold bias tape to the outer edge of the bib the same way I had to the pocket top edge, leaving the ends raw and flat, to be covered later with the next piece.
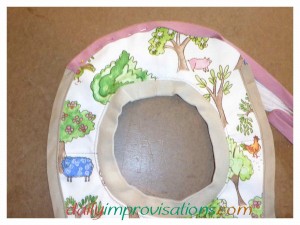
29. I found another scrap of double fold bias tape that was a reasonable color for the bib. I cut it to a length that gave enough to fold under 1/4 inch on each end and cover the raw edges of the other bias tape when I sewed it on.
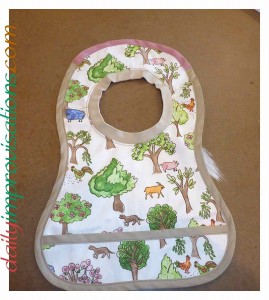
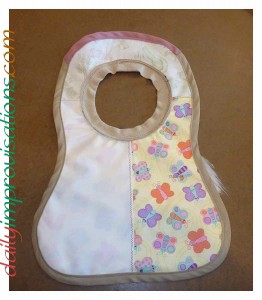
30. I tried the bib on a stuffed tiger, because the grandbaby was still not available.
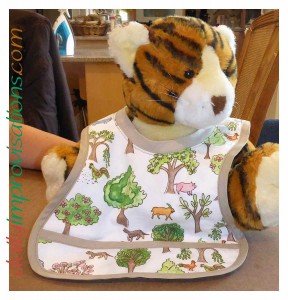
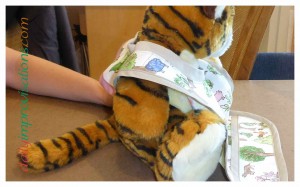
I already have ideas for the next model of bib. I hear she could use a few more. She did finally show up to try them on. They are loose around the neck. My daughter will use little plastic clips, like short clothes pins, that she keeps on the refrigerator to hold small bags of things closed. A clothes pin would work, too. In the photo, the bib was just pulled down to the back more right before Cori started eating her popsicle.
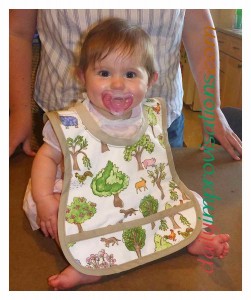
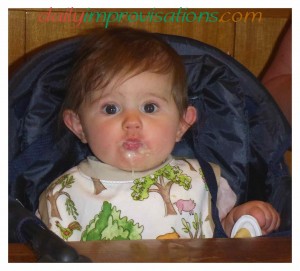

Popsicles, babies, and bibs, oh my! 😀
Very impressive! The bib is so nice and I like how it turned out. Well, you’ve done a very great job. Congratulations!
thanks, Rob. Don’t know why I didn’t see your comment earlier!