by guest writer Chef Betharoni Bird
When it comes to baking, cooking, or any kitchen activity, I tend toward the elaborate. Ask me to make dessert and I’ll bake and frost a four-layer cake. Ask for breakfast (or just leave me alone in the kitchen) and I’ll cook up crepes and turn them into blintzes with a side of blueberry sauce and serve them with shirred eggs and ham. Once or twice a year, I like to cook a formal dinner with a minimum of six courses for The Daily Improvisationer and The Amazing Engineer and guests. Not only do I want to make everything from scratch, from graham crackers to cheese, I want it to look good and taste wonderful. And if there’s menu planning happening in the house, I want in on it. So when I knew summer vacation was nearing, I approached my mother with my menu plan.
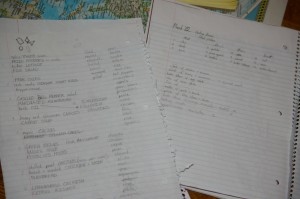
Now when it comes to Idaho winters, my ability to self-amuse in the kitchen for hours on end serves me well. But when the weather changes from snow to sunshine, and we drive up to the lake, my menu planning often fails to reflect the fact that I’m setting myself up for this:
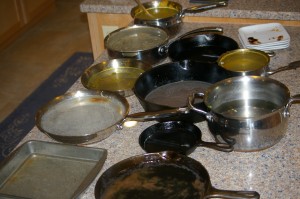
With this tempting me from the window:

And that is why the prototype menu is always presented to The Daily Improvisationer for approval and modifications. I have learned from past menus to reduce the difficulty level of meals, to drop the plan to bake something for breakfast every morning. The cardinal rule, though, is that the first night’s dinner must always be simple and easy. Traditionally, this has meant spaghetti with garlic bread and salad on the menu for the first night. But my interest in complexity and originality is always colliding with this accumulated knowledge. A whole week of vacation? Surely there will be time to try this breakfast muffin recipe, and this egg dish, and these scones. We can grill hamburgers for an easy meal, but doesn’t that mean that we can deep fry fish for another and have a 20 topping baked potato bar for another?
Then, when the menu is presented for review, I am gently brought back to reality and the menu is deftly transformed to reflect the reality of appetites, propensities to sleep in during vacation, and unfeasibility of cooking and carrying 20 unique items for one night’s dinner. So this year, I relinquished the baked potato bar and the scones, but managed to carry my motion that we change out the first night spaghetti for individual chicken potpies.
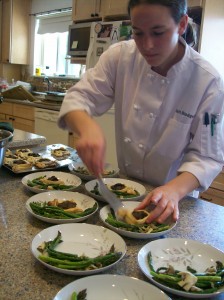
The Daily Improvisationer took my list of supplies away and returned with the requested carrots, peas, corn, and chicken, plus the appropriate miniature tins in which to construct and transport the potpies. Then I drafted the Youngest Sibling and ventured into the wall of cookbooks to decide on a recipe and method. My favorite blogger failed me, by saying she preferred her potpies brothy, and several of the cookbooks seemed to share that opinion. My ideal potpie, however, was already materialized in my brain, complete with taste (creamy), looks (crimped) and aroma (heavenly). Rather than type various combinations of keywords in endless searches on the internet, wondering if this recipe and that recipe combined would yield this ideal potpie, I went back to basics and grabbed Betty Crocker’s Cookbook, the best worn item on the shelves, which always opens to the recipes for cherry and strawberry pies and has been torn, ragged, and had loose pages tucked between the bound for as long as I’ve known it.
- After seasoning the bone-in chicken thighs with butter, salt, and pepper and popping them into a 375 degree oven,
- I used the White Sauce recipe as a reference to making a basic chicken gravy. Equal weights of butter and flour were melted together in a sauce pan and stirred until brown and crumbly (referred to in all of my formal culinary classes as a roux).
- The Youngest Sibling poured the milk in slowly while I stirred to incorporate and evaluated the thickness as the mixture regained a boil after each addition of liquid.
- We tempered the creamy flavor with some Better Than Boullion broth (total liquid was about 2/3 milk and 1/3 broth) and balanced the sauce with salt and pepper.
By the time the sauce was thickened and flavored to my satisfaction, I felt like I had departed too far from the original white sauce ingredients and instructions to realistically claim that following the recipe would yield the same results, but I was still happy with the cookbook for providing the jumping off point.
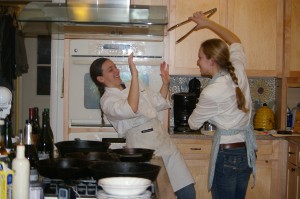
- When the chicken temped out at 165+ degrees, we pulled it from the oven.
- The heat on the gravy pan was turned off and we poured the mixture into a large mixing bowl, setting it aside to cool
- We chopped the carrots into 1/4″ cubes and put them into a bowl with a bit of water, covered, and microwaved for 2-3 minutes. The goal was not to cook them through, just to soften them slightly.
- The frozen peas and corn were set out to thaw on the counter
- After the chicken had cooled for a few minutes, we pulled it off the bones with our fingers and tore it into short strips.
- Then, with a disregard for measurements that stemmed from the fact that I was not, at that time, planning on writing out a recipe for other cooks to follow, I poured in carrots, peas, corn and chicken until the ratio of filler to sauce met with my satisfaction.
- This is where the possibilities for modification are relatively endless – you could use sautéed onion, mushroom cubes, zucchini cubes, etc. Just remember that the filling won’t cook much more than it has already, so you might need to par-cook the firmer add-ins.
- Tasting spoonfuls were distributed to anyone who happened to be in the house at the time and after universal approval, the filling was sent off to the garage refrigerator to chill until further notice.
Overlooking the brothy filling, I used this recipe for potpie dough, tripling the recipe to match my rough estimate of how many potpies I would end up with. Then, not wanting soggy bottom crusts, I spooned chilled filling into the bare aluminum mini pans, rolled crusts to match, got a bit wild with my decorative steam slits, crimped the edges under in a variety of different ways, popped the plastic covers on and stacked up the pies as I went. My “recipe is a guideline” approach yielded 14 potpies worth of filling, slightly less than the crust multiplication would have been able to handle and a few tins under the number purchased, so I dropped the extra crust into the freezer and the extra tins into the pantry.
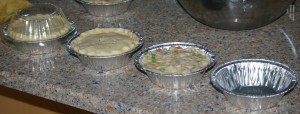
I learned fairly quickly that the traditional pie crust formation where the dough sits on the lip of the pan would not work for these tins, since the plastic lids use that space to lock on, so I did a double roll under on the dough after trimming it. We used mini cookie cutters and freehand paring knives to create slits in the dough and I found it was actually easier to make the slits while the dough was still on the floured counter and then transfer to the pie. There was no need to push the cutter all of the way through, since the slight stretching of the dough during transfer widened any weak spots into actual breaks.
I greatly enjoyed the help of the Bethany Pastry Cloth my sisters gave me the previous Christmas, not only because it kept counter cleaning easier, but also because it made for a fun scale on which to see how miniature the pies actually were.
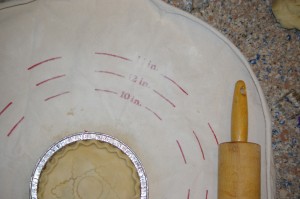
The potpies were then stacked into the freezer where I could occasionally peek in and delight in their cuteness until it was time to head for the cabin.
- On travel day, the pies went straight from freezer to cooler at about eleven a.m. and from cooler to oven at about 5 p.m.
Between not having used the rental cabin’s oven before and not having made this size or variety of potpie before, I was somewhat apprehensive but I forged onward.
- I popped seven potpies onto a cookie sheet and into the 350 degree pre-heated oven. The cookie sheet not only catches any drips, but makes it much easier to pull the pies in and out of the oven.
It didn’t take very long for them to heat up enough to send out a lovely aroma to all floors and corners of the cabin. Having set the time, I waited impatiently until it began beeping.
- After 30 minutes the crust wasn’t even close to browned.
- Since we hadn’t been sure what time the different vehicles of people would arrive at the cabin, I continued to add pies to the seven in the oven until all fourteen were cooking away.
- Every 10 minutes when I checked the oven, I increased the temperature by 15 degrees, until the oven display said 450 degrees.
The filling on the first set of seven overflowed before the crusts browned (good thing that cookie sheet was there!), but the pies that were in for a shorter period at a higher temp heated through just as well and managed to keep all of their insides inside.
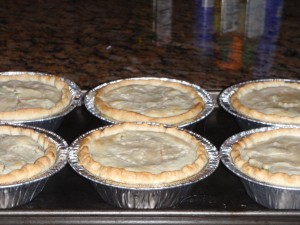
So, although I still don’t know what time and temp would work best for these little beauties at home, next time I make them, I think I’ll start the oven at 450 degrees and the timer at 30 minutes.
When I pulled them from the oven, everyone was more than ready to grab a fork and start in. Some of the diners made it through a bit more than one pie and some through a bit less, but there were definitely plenty to go around. We replaced the plastic lids on the extras and put them in the refrigerator for a lunch that would fit easily between the hiking and kneeboarding schedule for the next day.
When lunchtime on day two rolled around they reheated in the microwave without any issues, since we transferred them out of the metal pans into microwave-proof bowls. Best of all, the combination of fun-to-fiddle-with, easy to pop in the oven, and simple yummy flavor kept everyone happy.

Those look AMAZING!!! Awesome job, Chef Beth!
Hey I remember those!
And I even remember these! Good job and both writing out the details of what you did, and how wonderful they turned out. 🙂