I started out to make a dress to wear to the wedding. Then I found one in my closet that fits much more nicely since I lost about 15 pounds. Only now, after all this barefoot activity, I was cringing at the thought of my dress shoe choices. I briefly considered going barefoot, since it is an outdoor wedding, but social expectations hung over me. Besides, the ceremony will take place at a cabin in the woods and I might not be able to see the ground. It has never occurred to me to make my own shoes before, but it did today.
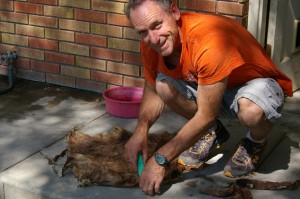
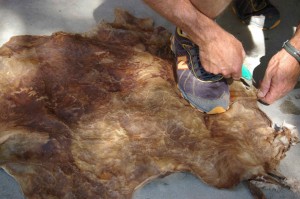
I mentioned it to dear hubby and he was very supportive of the project. He immediately thought of the 13 year old deer hide he had hanging in the barn and I experienced my second major *cringe* of the day. Still, it was leather and free. It helped that he set right to some final cleaning, softening, and ironing. (He promises he cleaned the iron right afterwards…) Meanwhile, I searched the internet for ideas and came up with a pattern of sorts.
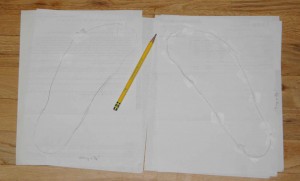
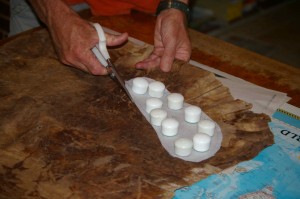
I must emphasize that I made several mistakes while making this first pair. Some I may not have yet realized! Also, I had to make adjustments to deal with the somewhat stiff deer hide. I traced my feet, making sure that I was fully bearing weight on them, then sort of rounded that out to create the pattern piece for the soles. I added about a 3/8 inch border all around for a potential seam allowance. Next time I will probably cut the sole more narrowly where it is under the arch. The topper pattern was sketched by tracing around the toe and sides of the sole pattern, but leaving it in a open “U” shape at the bottom. I determined the distance of the outer perimeter by placing a string around the sole tracing, then stretching it straight to measure. Greg doubled checked my results (or did it an easier way) by measuring around my foot with the cloth tape measure perpendicular to the floor. Again, I made sure I was standing with full weight on my feet.
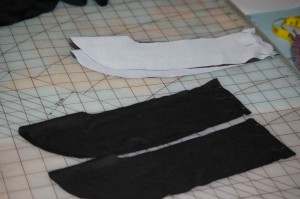
I cut pieces for toppers and soles out of both outer and liner material, all things I had on hand. My worst choice in that category was thinking a knit would be comfortable and easy to work with for the topper liner. I will not do that again. The sole liners were quite acceptable, being cut from a soft, but substantial slightly fuzzy cotton woven. The outer topper, the part that is seen, is cut from a only slightly stretchy polyesther faux snake skin that my son bought as a scrap in Taiwan 3 years ago! (waves at Jesse)
Then, based on this blog on making slippers and this equally good slipper tutorial, I began to sew pieces together.
1 ) I sewed the heel seam(right side of fabric together) first, that is, the ends of the open “U’s”. All seams are a bare 1/8 inch, then reinforced with a very narrow zig zag in the seam allowance.
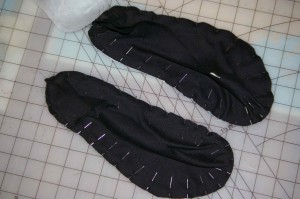
2) Next, I attached the sole liner to the topper liner, also right sides of fabric together.
This next step is the most glaring deviation from directions for making the slippers.
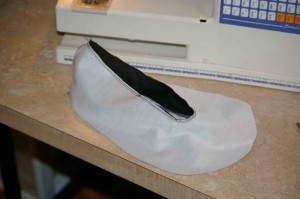
3) I saw that I needed to sew the right side of the outer topper to the right side of lining topper around the upper edge at this point. To help that seam lay flat, I under stitched the seam allowance to the topper lining. Then I top stitched the upper opening a scant 1/8 inch from the edge. This is where I admit that I accidentally sewed one liner-topper combo inside out, but had gotten so far along before I noticed it that it would have been a lot of seam ripping to get it out. I tried it on as was and decided it didn’t make enough difference for this pair of shoes.
4) Meanwhile, Greg was moving on to cutting out the soles, followed by using a freshly sharpened ice pick to poke holes a scant 1/4 inch apart about 1/4 inch from the edge:
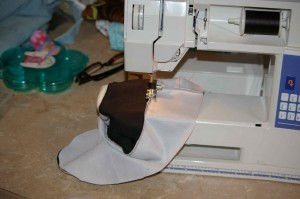
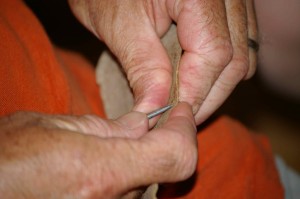
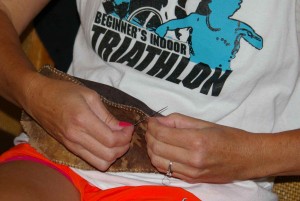
5) Then I proceeded to use a large needle and doubled regular thread to whip stitch the wrong side of the fabric outer topper of the shoe to the deer hide sole. I always began a new thread under the the topper, to hide the knot. I ended the thread under the topper as well, enabling me to tuck it under with the next bit of sewing. For the final section, I just tied it tightly, left the cut with about 3/4 inch thread out, then pushed it into the shoe seam with the needle. I will consider using a tougher thread next time, but I wanted to not make any trips to the store this time around. We’ll see how it holds up with wear.
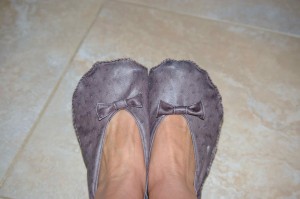
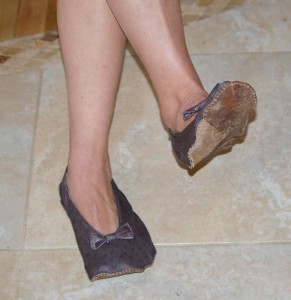
6) I made a simple bow and hand sewed it in place.
You can see that the deer hide stayed a bit wrinkly. It is also a little slick. May need to rough it up. The topper may have been a touch too short, heel to toe. I added a dart of sorts lengthwise along each side of both shoes because it looked like there was too much fabric there. Even with all the mistakes, I am ready to try to make another pair. They are super comfortable and very inexpensive. There is fashion potential. I have enough deer hide for at least one more pair. When that is gone, I will look for a softer leather for the soles, and maybe use two layers it. The possibilities are endless.
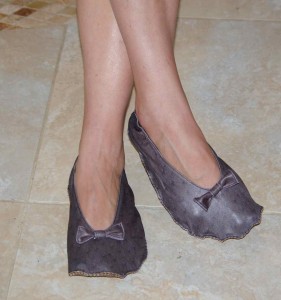

I’m impressed!
Those are really cute! I like your bows. I’m going to have to see them in person, it’s a little difficult to see the color and texture of the topper fabric on the pictures. Keeping in mind I don’t do much sewing right now, I’d recommend using the upholstery thread for this kind of thing – I’ve used some I bought while at Hancock Fabrics for a couple projects, and it holds up pretty well. I hope they fit the bill for your wedding party! 😀
Heidi, that sounds like something to try. I also thought of quilting thread, which is heavier than garment/regular thread. Thanks!
Now that’s something I would have never thought of using deer hide for! Good job, mom, I liked the slippers. 🙂