I moved my greenhouse tomatoes back indoors in mid October. The foliage looked pretty good after I pruned the two plants. They even had a couple of green tomatoes still growing on them. I had to throw one of them away due to end rot, but the other was very flavorful when I picked it for lunch in the middle of November.
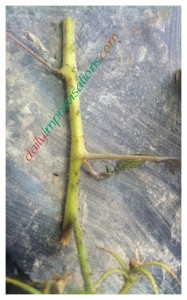
Unfortunately, a couple weeks later I had two problems. One was flying insects. Some research revealed that they were probably fungus gnats, little wispy bugs that fly around pretending to be fruit flies, but really look more like a mosquito. They don’t bite like a mosquito, though. They just lay larva in the soil. The larva likes rotting and fungul type material in the soil. They might also munch on the roots of the plants. I have several different pots in the greenhouse, including houseplants and two pepper plants that I also brought in from the patio. The flying fungus gnats seem most attracted to the tomatoes. The larva are easy to see on a labeling stick that has been in the soil for a few days. The airborne adults either like or get stuck to the branches of the tomato plants. If you want to read more details of the fungus gnat life cycle and see good photos of them close up, I suggest this webpage. They are too small to photograph well with a typical household camera!

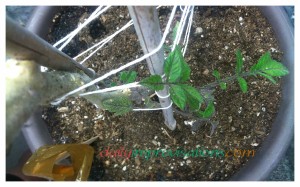
The safest and most sure way to kill the fungus gnats was reported to be using the same substance that is safely used in ponds to kill mosquito larva: Bacillus thuringiensis israelensis. I was able to find some at D&B Supply (my local farm and garden store), back in their limited winter stock of garden and pond supplies. This brand was labeled “Quick Kill Mosquito Bits.” It is important that it be the israelensis strain, or subspecies, of Bt, as this makes a difference in what it is effective in killing. The directions said spread a teaspoon for every 25 square feet and there was no mathematical equation that was going to reasonably help me decide how to divide that up for a gallon pot. I put a few pieces in the container lid, then sprinkled them around on top of the soil in the pot. Then, I watered them in. I did this to all of the pots in the greenhouse even though the other plants look fine. Now, I am trying to let the pots dry out some in between, as this is supposed to be another way to kill the larva. A couple of places I read suggested sprinkling the top of the soil with cinnamon, but I don’t want to try too many things at once. I want to have some idea of what might be working. (click on any photo to enlarge)
Putting the Mosquito Bits in the soil will only affect the larva, so I looked for sticky cards to catch the adults. The only thing like that that I could find was either pads large enough to catch mice and killer spiders, or the uncurling-hanging fly catchers. I really don’t like those fly catchers, but I figured they would only have to be up for a short while. It turns out they were too cold to come out of the packages. The garden supply area at the store was like a walk in refrigerator, or colder. I didn’t know the cold would be an issue, to I just proceeded to follow the instructions on the package. I ruined 3 of the 4 them trying to pull them out. I got one out far enough to wrap a short section around a jumbo craft stick and poke that in the soil next to one tomato plant. I made another makeshift sticky trap out of duct tape wrapped backward around an index card and taped to a jumbo craft stick (I have these around because I use them to label my seedling pots). After a week, there are a few adults stuck to both of these, but there are still many more in comparison right on the tomato plant. I never see any of those move when I am in there, so I am wondering if they are dead. I have ordered more appropriate sticky traps from amazon and they should be here any day. Meanwhile, it already seems like there are fewer gnats flying around in the kitchen, which is the room adjacent to the greenhouse.


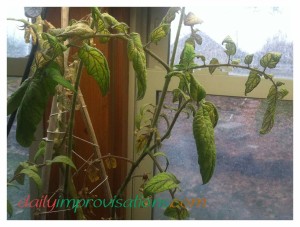
The yellowing, veiny look that was developing in the leaves was the same as what had happened earlier in the summer. In the summer, I assumed that the fertilizer in the potting soil had been depleted. There had not been any other signs of pest or disease. So, I watered the plants with a dilution of fish emulsion fertilizer. This didn’t change the leaves that had already grown, but the plant immediately began to show new, healthy looking leaves. Soon after that, they began producing tomatoes again. I decided to try the same thing this time around, even though I was a little worried about a stink from the fish emulsion fertilizer. However, it is what I had, so I tried it. The same thing has happened with the growth of leaves. Healthy looking leaves are sprouting from several places on each plant. There was not trouble with smell that I have always noticed in the summer when using the fish fertilizer. Maybe the chill of winter is on my side in this regard.
There are only a couple of older, dried blossoms, so I am waiting to see if I did it is time to get fruit from them. I researched growing tomatoes in the greenhouse, in particular to see if they were tender perennials. I know most of us grow them as annuals, but I had remembered seeing some in Zambia (Africa) that looked like they had been there more than one year. This is what I learned about tomatoes in general and about growing them indoors in particular:
- Tomatoes are tender perennials, meaning they only survive year round in a climate that is warm enough and doesn’t freeze.
- They are short lived perennials, in general. It may depend some on the variety.
- Tomatoes need at least 6 hours of light a day to produce fruit. They will do much better with 9.5 hours per day. (all light and temperature information as given in The Solar Greenhouse Book, edited by James. C. McCullagh for Rodale Press, 1978. I bought it from the used book store several years ago.)
- The only sure way to get them enough light in the middle of winter is with grow lights. You can see how I set up my taller grow lights for my greenhouse tomatoes here and learn some about the lighting needed in this article of mine.
- Temperatures should be above 55°F at night for blossoms to set fruit. Between 60-75°F is better.
- Daytime temperatures should be kept between 75-90°F.
- The average temperatures in their environment should be at least 72°F. My bubble wrap on my greenhouse windows should help with this, but I am also going to start using my little space heater in there more.
- The smaller the tomato fruit, the more likely to get ripe tomatoes in a greenhouse environment.
- It is easy to grow more plants by cutting a branch from another plant and sticking it in some soil to root. This would be an easy way to start some plants for the greenhouse in late summer without having to deal with seedlings.
I have plans to see how many years I can keep these tomatoes growing and producing. I may see if I can talk my engineer in to another set of lights in order to try some cherry tomatoes, too. Then, I start thinking why not try to grow bananas or oranges in the greenhouse. Um, well, probably because the trees grow much larger than tomato plants. I’ll probably go start some lettuce seedlings soon. They are short and fit under any of my grow lights! 🙂

Leave a Reply