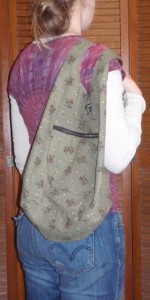
For my second project (first project: Urban Carryall) from Sue Kim’s book Bags–The Modern Classics I chose the Clarissa bag. I liked the look of its bucket-like shape. It looked easy to sew, cute, and practical for toting supplies. I learned a few more techniques along the way, and improvised due to both planned and unplanned outcomes.
Once I had located the lines for the particular pattern I wanted to use, I found it useful to highlight those lines to make tracing easier. The idea is to use a different colored highlighter for each pattern on a given sheet of multiple and overlapping pattern lines. The highlighting makes it much easier to see and keep track of lines with the tracing paper over the top of everything. Once they are cut out, I store them in their own labeled ziplock bag.
I decided to make a lined zipper pocket (not called for in the pattern) based on the approach used for sewing in the zipper on the Urban Carryall. I measured what size of pocket I would like for the side of the bag, then cut the main body of the pocket and a narrow section for the top, one of each piece out of the main fabric and one piece each of the lining. I also cut another larger back lining piece that would face the whole pocket once the zipper was sewn in. I found a old metal brown 7 inch zipper in my stock pile of zippers, because I have been trying to make as many bags as I can without buying any new supplies.
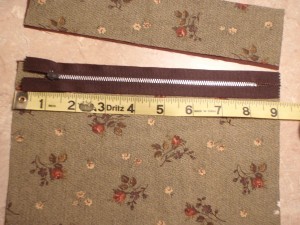
I had cut the pocket to 9 inches wide, but it looked like this zipper would work fine by the time I did all the finishing seams. The sewing process proceeded as follows:
- sewing the zipper face down to the main fabric (using a 1/8 inch seam, which makes it much easier to steer clear of the zipper pull tab),
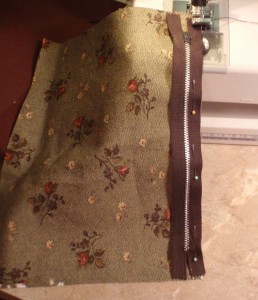
sew zipper to main fabric with right side of fabric against right side of zipper (pull tab against fabric) - sewing the facing, or lining, material of the same size over the top of the back of the zipper, raw edges even, then
- folding both sections of fabric over and back to expose the zipper and cover the raw edges,
- pressing and topstitching the fabric in place
- repeating this with for the other side of the zipper
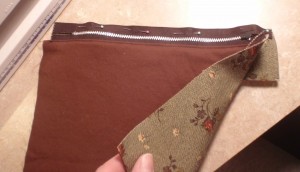
sew pocket zipper to narrow section of main fabric, right sides together - opening the zipper at least part way, so that it would be open enough to turn the pocket once the back facing was sewn on
- pinning the larger back facing to the pocket section with inserted zipper, right sides together.
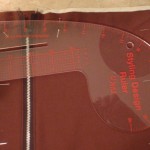
At this point, I decided I wanted the bottom of the pocket to be curved to shadow the shape of the bag. The Dritz curved ruler came in handy for this, but I forgot to leave seam allowance on the bottom of the pocket. I discovered this when I was sewing, to just made the bottom a little flatter.
- sewing the facing to the zipper section of the pocket,
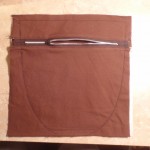
- trimming the seams to about 1/4 inch, and clipping corners down to size
- sewing the whole pocket in place on the side of the bag, sewing about 1/8 inch from the edge and reinforcing at the ends of the zipper
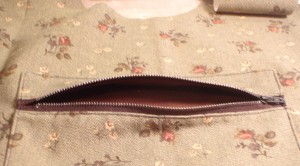
the brown back facing can be seen through the open zipper This approach very nearly encloses the seams inside the pocket and makes it all pretty strong.
The next challenge was making the darts show up on the slightly textured fabric. The chalk applied with the tracing wheel was rubbing off too easily when I was handling it. It was also hard to see well enough to follow when the fabric was under the presser foot. My solution was to go over the dart markings with an ink pen. I wouldn’t do this with a lighter fabric, but it worked well this time.
Just like with the Urban Carryall, I didn’t see any directions regarding seam allowances, but the markings for attaching the bottom circle indicated 5/8 inch seams. Sewing this bottom circle was the hardest part of sewing the bag. If the ends were pinned first, followed by the straight sections, the curves seemed to lay well after that. Still, it required patience.
I chose to zig zag with a narrow stitch right next to the original seam, for reinforcement. Then, instead of clipping out triangles of fabric so that the curve would lay well, I just trimmed close to the zig zag. I feel this is stronger. On tighter curves, if needed, it is easy enough to snip a little into section of the zig zag without cutting the stitching.
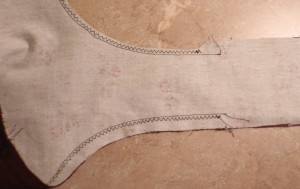
I also topstitched the whole seam, finger pressing the seam toward the base as I went around. This will give even more sturdiness to the bag and help it hold it’s shape. I did the same thing around the curves of the handles.
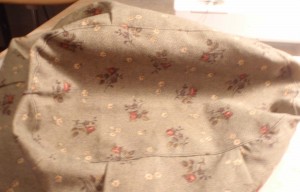
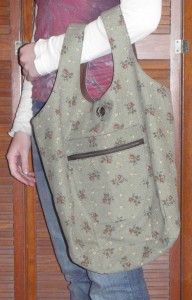
Next, I attached the handles, but I did it wrong!! The directions didn’t warn me about the ends all matching and I just automatically sewed them together across the body of the bag. It was a bit of a puzzle to me for a few moments why my bag looked so different! I did such a good job (they looked so neat and trim!) that I couldn’t bring myself to undo them. Thus, this first bag is truly a modified version. My daughters helped me verify that it felt good to hold and was practical.
In keeping with the theme of not buying anything new, I made a button closure for the top of the bag. The pattern calls for a magnetic closure, but I don’t like snaps, magnetic or otherwise. I think they are prone to stress the fabric. They are hard to replace and once the fabric is torn, it can be impossible to fix. Also, I have a million buttons that I inherited from seamstress grandmas. As fun as all the sewing antiques are sometimes, one of my goals in life is to avoid passing on too many ancient sewing supplies to my heirs.

Nice! And I can tell you that magnet clasps can cause magnetized cards to be demagnetized! It happened to me aboard the cruise ship on my key-card. Several other women had the same experience. 🙂
That is very interesting input! Thank you –