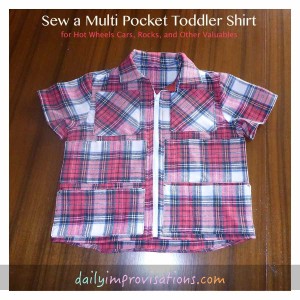
I finally finished sewing my 3 year old grandson’s multi pocket shirt. You see, he needed to carry more Hot Wheels cars than he has hands for. He hadn’t told me this, but I had noticed. I knew he needed some handy-dandy portable pockets. (click on any photo to enlarge.)
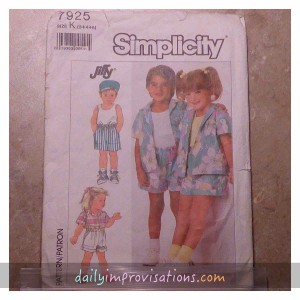
From my stash of pattens, I found a basic shirt pattern. The exact pattern shouldn’t make a difference, other than simple and with the fewer design seams, all of which makes it easier to place pockets. The pattern I have could be one I inherited from my grandma or that I bought almost 30 years ago for my oldest child. It didn’t have any extra yoke or piecing seams. The front pieces were cut to be self-facing. I’ll touch on that a bit later.
Constructing and attaching the pockets was done after attaching the interfacing to the front facing extensions, but before sewing any pieces together. As usual, I used a light weight woven fabric (white in the photos) for the interfacing. Basting the inner edge of this in place helped me keep track of pocket placement on the fronts.
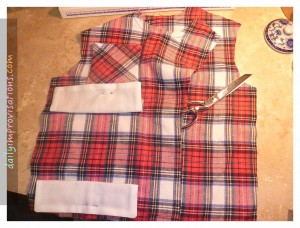
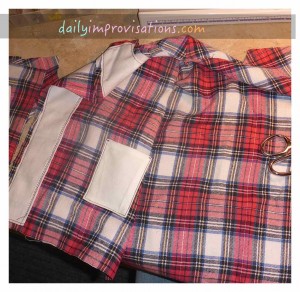
I am a fan of completely lining pockets, which means no ragged or fraying edges inside the pockets. I also think a complete facing makes it easier to neatly shape the pocket. All that is needed is a piece of the facing cut to the same dimensions as the pocket, taking into account seam allowances on both. For this project, I happened to use the same white woven fabric for the pocket facings that I used for the interfacing.
Once a pocket is turned right sides out and pressed, including pressing to the inside the seam allowances of the small section left open for turning it, it can be pinned at the desired location. I try to put the pressed, but still unsewn, opening to the bottom of the pocket, so that it can be sewn shut as the pocket is sewn in place. It saves a step.
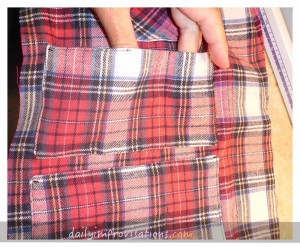
For this shirt, I wanted to fit as many pockets as possible to the front of it. I was aiming for sizes that would hold Hot Wheels cars, but not be too tight for little fingers to deal with. There still had to be enough room on the sides of the shirt for the side seam, on the bottom for the hem below, and room for some sort of closure in the front.
The basic pocket placement pattern was: two longer ones and one basic patch pocket on each side of the shirt. When I decided to add a couple of inside pockets, that affected how I could sew the outer pockets on.
One of the inside pockets was put on more to the middle of the front-side. This meant I had to problem solve how to sew the two long pockets on the outer front without accidentally sewing the inside pocket shut. First, I stitched the edges of the lower long pocket, since that didn’t not conflict with the inner pocket. To compartmentalize it, however, I was limited to only sewing half-way up, creating “thirds.”
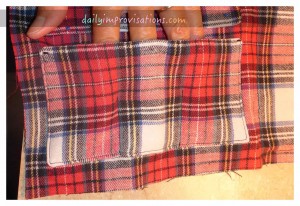
For the upper long pocket on this same side of the shirt, I could only sew the sides and the outer sections of the bottom of the pocket with the machine. Then, I placed a scrap of cardboard inside the inner pocket while I hand stitched the rest of the bottom of the upper long outer pocket. The spacing of things limited me to only making two sections from it, one larger and one smaller. I’m sure he can find cars that it works for.
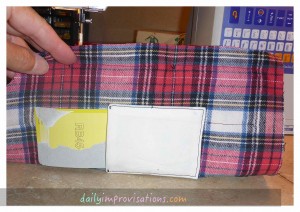
I decided to put the inside pocket for the other side of the shirt higher up. It fit just under and inside the expected edge stitching of the basic patch pocket on that side, although it would be hidden under the facing some, too. From the outside, both basic patch pockets, being comparatively square, fit in the same location next to the arm hole. When sewing on this second basic patch pocket, I was able to machine stitch all the way around it without sewing over any part of the hidden inside pocket.
Without an inside pocket to work around on the second side of the shirt, I was able to sew the section stitching in these long pockets all the way to the top. I only did this after assuring myself that Hot Wheels cars would be able to slip in and out at that size. Both pockets are divided into thirds.
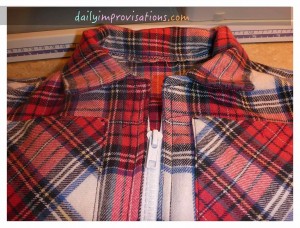
Now, it was time to sew all the rest of the shirt together. Shoulders, sides, collar went on smoothly. The only thing I altered was that I sewed the whole collar in one seam, not doing the partial sewing with the facing and then folding the seam under the rest of the collar. The flannel felt quite soft enough that it would be comfortable on the back of the neck, but I also top stitched that seam along the upper back of the shirt. (see photo below)
The back of the shirt ended up being cut a tad longer than the front. Rather than trim it all, I went with a trend I have been seeing of making the back longer than the front. The hem was done with a narrow, double folded method, only ending up using up about half an inch of the length of the fabric.
At this point, I was showing the shirt to one of my daughters, saying that buttons might be hard to fit in the narrow spaces left. She reminded me how much the toddlers like zippers. I went to Walmart and purchased a separating zipper to fit the front length of the shirt.
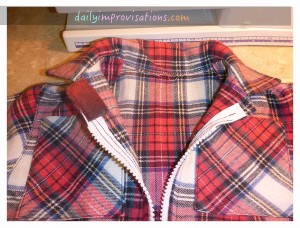
The cotton webbing that was part of the zipper was soft enough that I was happy with it. The ends of the zipper were smooth plastic, and thus also seemed reasonably comfortable. That meant that I could just sew the zipper under the facing extension. If the facing had been a separate piece, and I had known what I was doing earlier on in the project, it would have made sense to sew the zipper in between it and the front piece. As it was, I felt I needed to do something to cushion the sharper, top end of the zipper. I did this by angling it slightly away from the edge and sewing a small piece of polar fleece over the ends. Not only was it nice and soft, but I didn’t need to hem the edges of the polar fleece.
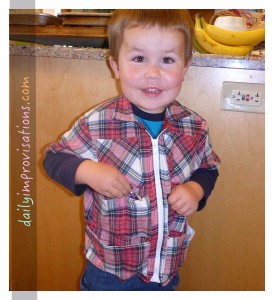
My grandson came by to try on the shirt the day I finished it. He seemed pleased to put some cars in the pockets, but a bit confused by why he needed a shirt when he was already wearing one… I was happy to see that it fit him. Hopefully, he will carry many things in its pockets this winter!
