Being able to keep my flute put together and ready to play is one thing that makes it more likely I will get to play it more often. There are two main problems with this, and one is tarnish. I asked for an anti-tarnish flute cover for Christmas, because I have seen the ready made one that my flute instructor has. My husband shopped around and found anti-tarnish fabric and asked how I felt about trying to sew one instead. I said sure.
He was able to order a whole yard of the anti-tarnish fabric for about ½ to ⅓ the price of a pre-made anti-tarnish cover. This gives me room for mistakes, opens up the possibility of making a variety of seasonally pleasing covers, provides the chance of making covers for friends, and gives me ideas about making anti-tarnish covers for other things. The Anti-Tarnish Silver Cloth (Black)came quite promptly from Fabric Hut via amazon.com. The instructions are very clear that it should not be washed or dry-cleaned.
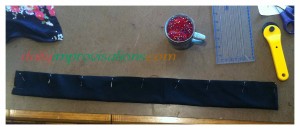
To estimate what diameter I should make the case, I laid the flute down on the cloth and wrapped the cloth loosely over the flute. I wanted it loose enough to slip on and off reasonably, but close fitting enough to get the benefit of the anti-tarnish cloth. I made sure I was doing this at the widest point on the flute, meaning where there are the most keys and where they stick out the most. I came up with the figure 5.25 inches. I rounded up to 6 inches to give me room for seam allowances and some ease. For the length, I measured the flute and added a couple of inches to make sure I had enough for the top and bottom. This measurement was 30 inches. (click on any photo to enlarge)

I suppose I could have just made the cover out of the black anti-tarnish fabric, but I wanted something else to look at. I didn’t want the outer fabric to be too thick, because that would make it stiff and hard to work with for the long tube shape. I wanted it pretty, but not something I would tire of soon. I settled on a scrap of silk. It was pretty, but sophisticated. Plus, it was very thin and would not add bulk to the flute cover.

To cut the silk out, I just put the rectangle of anti-tarnish fabric on top of it. I made the edges of the silk as straight as I could, which was pretty straight. I cut the silk the same length, but added about .25 inches to the width on each side. I figured I needed this extra room to fit the anti-tarnish fabric inside. (I was right.)

To sew each separate rectangle of fabric (one anti-tarnish rectangle, one silk rectangle), I started at one short end (back stitching to secure the threads), pivoted at the corner, then sewed the long edge. This left one short end open for the flute. I did fold the open end of the anti-tarnish fabric to the inside about 3/8 inch, sewing those folds down as I reached the end of the long side. I didn’t do this for the silk piece, but not for any huge reason other than it seemed harder to work with and would be simpler to work with by hand later. Since there will not be much stress on the seam, I did not do anything more to the edges of the anti-tarnish fabric. It was not showing any signs of unraveling. The silk was unraveling at the edges, so I zig-zagged the seam allowance.

Only the silk fabric needed to be turned right side out. This was very fast with my 12 inch Hemostats. Everyone who sews should have a pair of these for turning things! I then put the hemostats inside the anti-tarnish fabric (still wrong side out) and pushed it up into the silk tube. It was absolutely no trouble at all to get the closed ends to meet. Once that was done, it took about 2 seconds to remove the hemostats and pull the silk down over the anti-tarnish tube the rest of the way.
All that was left was sewing the ends together. I was pleased to see that the two tubes fit together perfectly at the ends. I rolled the silk edge to the inside and pinned it all in place. I opted for whip stitching this end, deciding it would be a headache to deal with the tight circle under the sewing machine. The end result is a flute cover that looks like it belongs in a Chinese museum!


The flute stand mounted on the wall was another Christmas present, which deals with the other problem with leaving the flute out: where to put it. I had wanted one that wasn’t on the floor , which is a proven hazard with the dog, potential trouble with small grandchildren, and generally seems in the way. The floor stand I have is falling apart, so it was a good time to change. The new stand was designed to be high enough to be out of the way and low enough to allow the flute to fit nicely over the peg. The peg that the flute sits over is long enough that the instrument is not in danger of falling. The position on the wall adds to the display quality, too.


Now, all I need to do is polish up my flute, since it has tarnished some from days left out on the bookshelf. But playing it is the first priority.
