Some bargain section outdoor furniture fabric was bequeathed to me unexpectedly by my husband. I had helped him find it on the jumbled shelves of unwanted bolts, but then he didn’t need it after all. The fabric is blue and white striped; thin and strong (like ripstop nylon), but probably a polyester. I had no idea what I was going to do with it. But there is something freeing about having a few yards of inexpensive, novel fabric laying around. It sets the imagination going in new ways. Pretty soon I had made a reusable leaf collection bag, a firewood tote with spliced rope handles, and now a delightfully practical colorful beach travel bag.
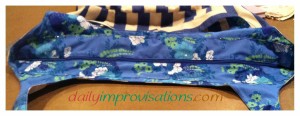
My beach bag is based off of the pattern for the Clarissa bucket bag that I made a couple of last year. This time around, I decided I wanted it larger, so I went through the process described here to come up with a new, larger bag pattern. Then I decided that I did still want a lined bag and several pockets. For the lining, I chose a very light weight, crisp Hawaiian cotton.
Since at least the most important initial use of the bag would be for travel, I tried to do things to the pockets that would make travel easier. For instance, for the basic open-top pockets on one side of the lining, I off-set the tops of the pockets. This should give my fingers “feeling” cues when I was reaching inside looking for things. I also made these pockets of varied size and shape. One is a good place for a few pens, another for a stick of lip balm. One pocket is again the perfect size for my iPad, but on the inside this time, to be more protected.
On the other side of the lining is a largish zipper pocket, which should be a handy place to keep some valuables a little separate from any jumble that develops in the middle of the bag. I will probably stuff a ziplock bag in there, so that when I do use it for a trip to the beach those important things can be kept dry.
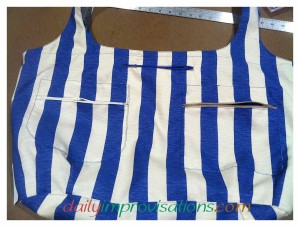
One of the outer sides of the bag has 3 different zippered pockets. (to see how I made this kind of pocket go to the 10-pocket Clarissa bucket bag linked to above) I used coordinating, but different colored zippers for each of these, again to help my harried traveler’s mind. Or a way to tell my husband where to look for something. I inevitably have something he wants…

There is one row of open-top pockets on part of the outside of the bag. I figure that if I am carrying or holding that side of it next to my body, it is just as easy to have things like my phone or passport easy to access. When I want them stowed more securely, I can put them in another pocket or the main bag section. One of those open pockets will also hold a couple of hankies, which airplane air always make me need.
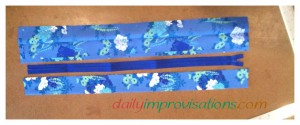
I experimented with what some people call a concealed zipper top for my beach bag. The top closing is not part of it’s original pattern. Since I might have to stuff it under seats or lay it down on the beach, I wanted an extra barrier against stuff falling out of the middle. I chose a zipper that was nearly as long as the top of the bag when it was laid flat. But since the bag is designed to resemble a bucket shape, I didn’t want it pulling it too close across the top. I made the casings for the zipper pretty wide, so that by the time it was finished, the whole zipper piece was about 5 inches wide. The dimensions of each piece of fabric for my casings was 5 by 25 inches. (See details under the photos for more specific explanations of what I did. Click on any photo to enlarge)


The few extra inches to the handles mean that the bag handles now slip comfortably over my head, to hang crosswise for easier carrying. I hate to have things keep slipping off of my shoulders when I’m moving or carrying multiple items. But the straps aren’t so long that the bag is in the way of my legs when I’m walking. The top of the bag sits near my waist and the bottom just below my hips.
I think I will sew a label on the inside of the bag with my name and number. I will also beg my artist daughter to doodle on the white stripes. Then, I will have an even more distinct, easy to keep track of, very functional beach travel bag.
If you are looking for some similar remnants, you might try this website: Suntech Fabrics clearance section.
