Every time I make a polar fleece poncho, I have enough fabric left over for at least one toddler sized one tunic. Not that I had made any before this Christmas. I have made ear muff headbands and convertible mittens and hats and gators, but this fall it dawned on me that I needed to make tunics for the grandkidlets. I came up with a very satisfactory way to sew them that should work from any pattern, including if I every want to use the same idea for a larger size. (click on any photo to enlarge)
1. Find a basic, loose fitting long sleeve shirt or sweat shirt pattern. The one I had that was closest to this was designed for shoulder closures, but I adjusted this out of the pattern as I traced off of it, so that I could just sew the shoulder seams. I used a size one for all three girls.
2. Decide or estimate how long of a slit is needed in the front to allow for ease of getting the tunic on and off. I admit to eye-balling this, but it might be more accurate if you measured your victim’s head circumference, then added a couple inches for ease. The neck opening circumference plus the slit perimeter should end up very close to this calculation when it is all sewn together. Since this is not a stretchy fabric, it is better to err on the side of too much ease. It is just a tunic and something else will be worn underneath.
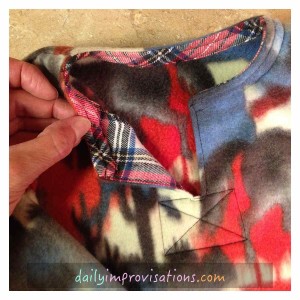
3. Create a pattern piece for the front facing by tracing the front pattern piece from the neck line to the shoulders, then add a couple inches of shoulder width and draw a wide wedge down about 2.5 inches past where the end of the slit will be. Look at the photos below for the basic shape I used. I didn’t get the first couple of facing pieces cut up to the shoulders as well as I would next time, but I worked with that by sewing the edges under and then top stitching the whole facing down after I had made the slit.
4. Cut the front facing out of a coordinating flannel, according to the pattern created in step 3. Also, cut a strip of bias tape out of the flannel. The bias strip needs to be long enough to go around the neck opening and have ends to fold under for a clean finish. I found that a width of 1.5 inches and 17 inches long worked for me.
5. Finish the edges of the front facing as desired. I turned it under about 1/4 inch to the wrong side and zig-zagged it in place. This way the raw edges would be covered when it was sewn to the shirt front later. There is no need to finish edges of the bias strip, as that will happen as part of the process of attaching it to the neckline.
6. Make marks as necessary to center the facing over the tunic front, right sides together. Then, sew about 3/8ths of an inch down one side of the slit site, continue by sewing a square the end just enough to get you to the other side of the slit site, then sew back up the other side.
7. Now, carefully cut straight in the middle between the parallel stitchings, but STOP about 1/4 inch from the bottom. Here, cut diagonally to each corner, but do NOT cut through the stitching.
8. After a bit of finger pressing, understitch the narrow seam to the facing on each side of the slit, as far down as you can without creating any bunching or catching other fabric as you sew. This will really help the slit lay flat.
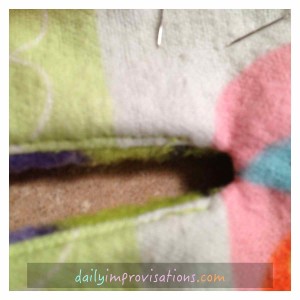
9. Top stitch the slit all the way around, about 1/8th inch from the edge. This will reinforce the bottom of the slit, the weakest point and the area subject to the most stress. And it will make the slit lay even better.
10. I like my facings to stay put, so I pinned the facing flat and topstitched all along the outer edge. I did this working from the inside of the garment, since it was most important that it lay flat. The outline would look neat from the front as long as I maintained fairly straight lines.

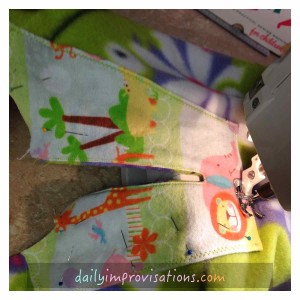
11. Sewing the shoulder seams is next. As with most of my seams, I also use a zig-zag stitch in the 1/4 inch of the seam allowance, right inside the main seam. Then, I trim the remaining fabric beyond that and top stitch the seam to one side.
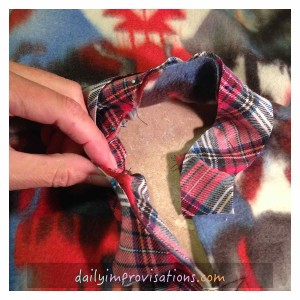
12. It is easiest to finish the neckline at this stage, because it can be laid flatter under the sewing machine. (see photos that will follow to help visualize the steps)
- With right sides together, pin the bias strip to the neckline edge, leaving enough overhang at each end to turn under later. Sew according to the seam allowance in your pattern. This is usually 5/8 of an inch. Trim the seam allowance to about 1/4 inch.
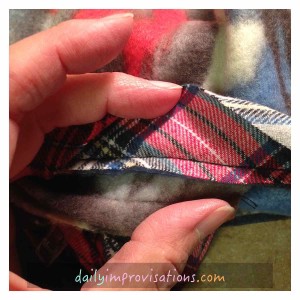
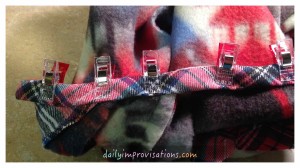
- Turn the bias strip to the inside at the seam line, folding over the other edge so that what you now see of the bias strip is about 5/8 inch wide. I found it helpful to use the clips you see in the photo to hold it down, since the polar fleece seams can be kind of thick to use pins with. Here is a link to the clips on amazon.com.
- Stitch the bias strip down on the polar fleece, sewing near the folded edge. Don’t forget to fold the ends under the bias strip to make it all neat at the slit opening. On the right side, it will look like top stitching about 5/8 inch from the neck opening.
13. Next, I like to sew sleeves to armholes (still open at the bottom). I recommend a row of basting just inside the pending seam allowance to ease the sleeve to the shape of the armhole, even if the pattern does not call for it.
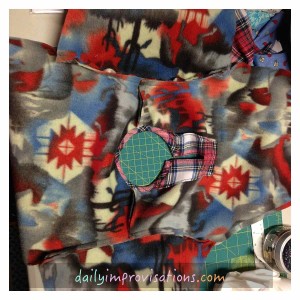
14. The side seams and sleeve seam can now be sewn. I like to start both of these seams from the underarm. This helps things line up better, and reinforces the underarm.
15. Lastly, hem the sleeves and bottom. Sew in a tag, if you like. I bought some for a very reasonable price from The Dutch Label Shop. It has been very fun to put them in things, and they also create a way to hang things from a hook.

I make so many ponchos that my husband made me very sturdy, reusable pattern pieces from the original tissue paper pattern, so you know I need ways to use the polar fleece leftovers. Below you can see three of my granddaughters modeling their tunics for me. It’s nice to make something for little kids that can accommodate more than one size. The sleeves can roll up for now, but then they can probably still fit in them next winter!


Leave a Reply