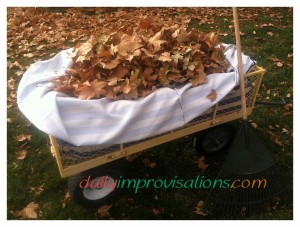
I didn’t know I needed a reusable leaf collection bag until last week. I knew I needed something to help me contain leaves and transport them to the chicken yard, but my problem solving was incomplete. Even though my son showed me how to blow (did you know the top of a shop vac can be used as a blower!) and mow the leaves in most places, there are times when I just want to clean up a small area without dragging out the heavy equipment. Like when a blizzard of dry leaves have accumulated in walkways on the patio or at the front entry door to the garage.
If you have piled leaves in a wheelbarrow or garden cart (wagon), you know that they tend to blow away as you travel to deposit them. Hit a bump in the path, and they escape in numerous directions. Crunching them down only works so well. They stick to my clothing and I come out looking like a monster from the leaf pile. Plus, the ones still left in the transport container tend to spring back up again. The garden cart theoretically holds more than the wheel barrow, but mine has wire mesh sides and base, so smaller leaves (like from the locust tree) fall right through. Last week, while I was struggling with all of this, it occurred to me that what I needed was a bag that was custom fitted for my garden cart.
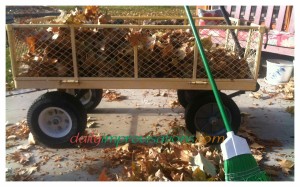
I thought of just using the plastic yard bags that I use to collect debris I am throwing away. However, they tend to tear getting them in and out of the garden cart. They also are of a size that would make it harder to efficiently use all of the cart space. They are a good fit for a wheelbarrow, but using a wheel barrow means a lot more trips for the same amount of leaves
So, I decided to sew a reusable custom fit leaf bag. Since leaves are light, it could be as large as the cart. If I wanted to be able to pile the leaves higher than the cart side, the bag would either need reinforced, taller sides OR it would need a drawstring closure at the top. I thought the drawstring closure would be faster to sew and easier to store.
There was some weather resistant, patio furniture fabric sitting around in my sewing room. We had purchased it off the bargain rack when my husband was problem solving how to make a winter cover for my outdoor swimming pool. As I brainstormed, I realized this would be perfect for a reusable leaf bag. It wasn’t expensive enough for me to worry about wear and tear. The blue and white stripes were just enough to add a little color to my work environment. For a draw string, I would try some of the left over bright yellow poly rope from another part of the swimming pool project.
It seemed best to make the base of the bag to function as a liner to the garden cart. I measured the bottom and each of the sides. Then, I cut pieces of fabric that were ½ inch larger on all sides, to serve as seam allowance. (click on any photo to enlarge)
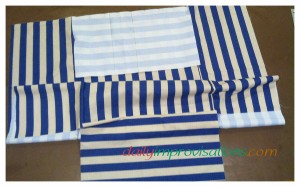
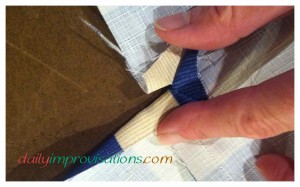
The side pieces were sewed onto the base piece one at a time, leaving ½ inch free at the corner attached to the base piece. This would be used when the side pieces were sewn together, which was the next step. Then, I had a box shape.
Now, I measured the top edge of the box shape, all the way around. I added an inch to that, again for seam allowances. I estimated how tall I wanted my bag to be, which ended up being about 45 inches. I knew some of this would get taken up by gathers when I pulled the drawstring top closed. So, this piece was as long as the perimeter of the upper edge of the fabric box.
After sewing the short ends together, so that it was a big circle, I pinned one edge of the circle to the top of the fabric box. I had left the selvage on one long edge of this piece and wanted to use that for the drawstring casing. I had evaluated that the selvage did not have noticeably different weave than the rest of the fabric, so it would lay flat and I could avoid extra edge finishing. This meant that I wanted to use the cut edge for sewing to the fabric box.
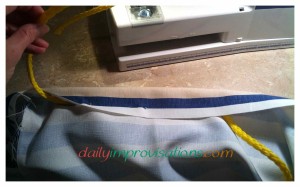
I had a couple of puckers, because I had measured it all with just holding a measuring tape along the edges. I figured it didn’t matter for this project and trying to be more precise was going to take unnecessary time. I would probably never notice it while working.
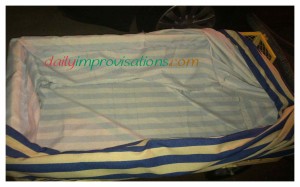
Now it was time to sew the casing for the rope. It only took me a couple of seconds to conclude that threading the rope through the casing would be hard. I hoped that I could just sew the casing with the rope in place, inside already. I also thought that with the stiff poly braid rope and heavier canvas like fabric, it would be easier to gather if I left the casing fairly loose. I pinned the casing in place and it all sewed up very smoothly. I left two places open, where the rope could be used as handles to gather the top of the bag.
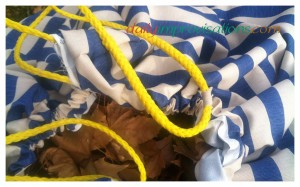
I had left almost a foot of rope sticking out of each end of the casing, thinking I would tie it. I had obviously never tried to tie poly braid rope before. It was going to flex itself right out of the triple square knot I was so proud of. I approached my knot savvy engineer husband. He knew how to look up “hollow braid back splice,” of all things. He tested his new knot skill and thanked me for giving him an opportunity to learn this useful knot.
Here are the links to the PDF instructions he used:
The box part fits nicely in the garden cart. I had kind of hoped the sides would fold over the outside of the cart, to hold the bag open some, but apparently I needed the very top to have a tiny bit of flair for it to do that. It will still work well. I filled it up with some stuff in the garage, including an old blanket, to see how it looked with the drawstring pulled (pre-special knot for the photo). I was looking forward to leaf collection again soon, which is not like me.
When I used it, as the leaves piled high, I could fold down the top and crunch the leaves. This way the garden cart ended up holding at least 4 times as many leaves as it could have unlined. I think this makes it a magic leaf bag?
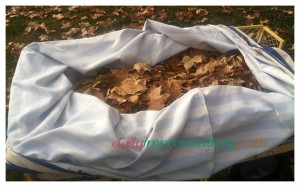
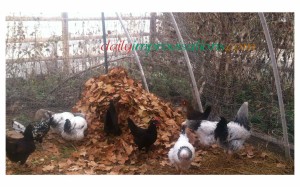
Having it in the cart made the whole process easier on the back and easy to relocate for new collection sites. However, I discovered that when it was full, it was still light enough for me to pick up. The wagon shaped bag slung over my shoulder, in the spirit of Santa Claus for chickens, fit nicely through doorways, so I was able to go straight through the garage to the chicken pen, instead of pulling the cart around the house. It was also a good fit through the chicken pen gate. The chickens were terrified of the large blue and white striped bag, but after I coaxed them back out in the open, they liked the pile of leaves just fine!
I am thinking this basic design could be used for something like a warming “cloth-bag” to fit in a serving basket or container for bread or dinner rolls. Or, maybe a stash of yarn next to the couch for crocheting. The bag base can be made to fit any container, then a circular section sewed on for the drawstring part. It would be quite a bit easier to measure more accurately for smaller projects. I’m also thinking the still somewhat large scraps of outdoor fabric I have will make nice purse or grocery style bags. One thing always seems to lead to another!
