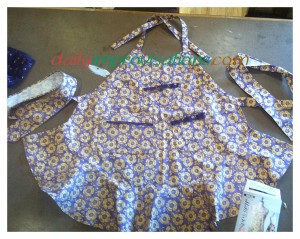
Sewing an earbud cord porthole is similar to making a bound buttonhole or welt pocket, only easier. Just apply a facing to the area where you want the porthole, stitch, slash, turn, and press. That’s it in a nutshell. Even if you are unfamiliar with this process, and the sewing lingo, I think my explanation and photos below can lead you through it. You just have to decide what type of pocket you want over the top of it, which can be a simple shirt front style pocket. Then, the porthole will be your secret. Unless, of course, you choose to answer questions about how you can have your music player or phone in the pocket, but there is no trace of how the earbuds are connected to it.
I chose an apron because I do a lot of kitchen chores. Almost all of my aprons already have some sort of pocket, but with all the bending and reaching while I work, my iPod earbud cord is constantly getting yanked by a cupboard knob or trying to add itself to the dinner ingredients. There have been a couple of near misses with a knife. I’ve thought of a clip, but just having the cord exposed, at a length that works when I’m standing, means it is going to get caught on things as I move by. (click on any photo to enlarge)
Here is what you should do to make your earbud porthole:
1. Decide on a porthole size. You don’t want it so small that it is a hassle to slip the earbuds through, and you don’t want it so large that your music player or phone will slip out the back way. I chose a length of about 1.5 inches.
2. Pick a pocket size and design. A simple lined pocket is fast and easy. I decided to do a zipper pocket to add a little more security and pizzaz. I will write a separate blog on how to do this soon, and link to it here.
3. Determine the best location for the pocket. For the apron, below the waist was best because the device wouldn’t hang so heavily on the neck, it felt like a more natural location for grabbing it briefly to push buttons, and it is less likely to get things splattered on it.
4. Mark the future porthole slot near where the top of the pocket will be, but inside enough that it will be invisible. The cords usually come off of the top of a device, so this avoids tangling or kinking.
5. Cut a piece of facing that is approximately 1.5 inches larger in diameter than the slot. I made mine circular because I wanted to avoid needing to make neat corner. A basic, light weight cotton polyester fabric is a good thickness for the facing. Using a fabric that is very thick will make it unnecessarily bulky and hard to work with.
6. Finishing the edges of the facing will keep loose threads under control. I did this with a zig-zagged, and then rolled narrow hem all around my circle. All of the raw edges were then totally covered when I sewed the facing to the back of the apron later. A zig-zag stitch or serging the edge could work well, depending on the propensity of the fabric to unravel.
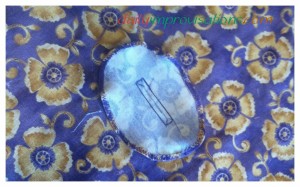
7. Draw your porthole stitching and slashing lines on the wrong side of the (now hemmed) facing. This will be a long, skinny rectangle, about ¼ to ⅜ inch wide, as long as you want the slot. Draw a line down the middle, ending it about ⅜ inch from each short end of the rectangle. Make lines from the end of it to each corner of the rectangle, forming little triangles.
8. Pin the facing, right sides together, to the chosen location on the garment.
9. Stitch along the perimeter of the rectangle, reinforcing by back stitching at the beginning and end of your stitching. I recommend starting and stopping on a long side of the rectangle. Doing it at a short end will make it bulky in the wrong places.
10. Slash INSIDE of the stitching, ALONG the middle line and into the 2 legs of the triangles at the end, WITHOUT cutting into the corners of the stitching. A seam ripper is a good way to get the middle of the slash going, but I always use scissors to carefully clip to the corners.
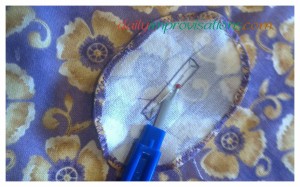
11. Turn the facing through the opening and to the wrong side of the main garment. Work the corners out with your fingers, then press the facing flat and out of sight.
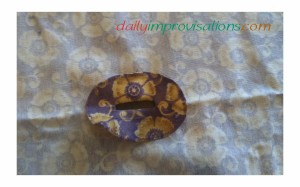
12. Pin the facing down to the wrong side of the garment, if you want to stitch it to hold it in place and keep it from bunching up.
13. Stitch the outer edges of the facing to the back side of the garment. This can be done by hand if you want it to be more invisible.
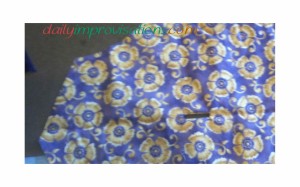
14. Edge stitch the opening of the porthole.
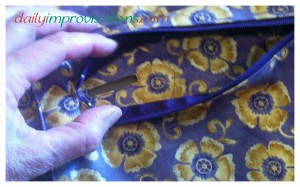
15. Make your outer pocket. I highly recommend lining even a simple, open top pocket. This finishes all the edges on the inside, and makes it easier to form the outer edge of the pocket. No raw edges inside the pocket means no threads to tangle with your earbud cord. My version of a zipper pocket was a little tricky because such a pocket is usually sewn into the garment. However, by lining the pocket shape I wanted, then making the same sort of opening in it that I did for the porthole, I could put in the zipper. I used a 6 inch zipper, so had made an opening large enough for that to fit. I positioned the pocket so that the pull tap end of the zipper was just over the porthole. Again, I will more thorough details on how I made the pocket soon.
This particular apron was from See & Sew pattern B5125. A relatively flat front makes it less complicated to be creative with pockets. I scalloped the upper edge of the other 2 pockets, then folded over a flap for decoration. There is only a secret earbud porthole behind the zipper pocket.

It took me very close to exactly 6 hours, from cutting out to last finishing touches, to sew this apron. I know this because unusual scheduling opportunities allowed me to do all the sewing in one block of time!
“Unfortunately,” this apron was a gift for someone. I will be considering retro-fitting some of my aprons with secret portholes. Since my aprons mostly have open top pockets, it should only take a little maneuvering. Then, my iPhone should spend less time on the floor or my earbud less time being violently pulled from my head while I work!
