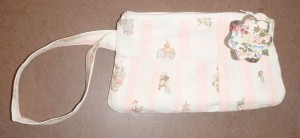
Sue Kim’s book Bags–The Modern Classics has been just the right place to begin for making a few bags that look nice, but aren’t overwhelming with the details. My third bag to try from her book is what she calls the “wristlet zipper purse.” I thought the pleats might make it more complicated than the other two I have made (the Urban Carryall and the Clarissa Bag), but I finished it faster than either of those. Of course, I had the experience of those two bags, but it’s small size probably also made it faster to sew up. (click on any photo to enlarge)
Since all of the pattern lines are black and criss cross each other all over the pattern sheet, I highlighted them before tracing, just like I did with the Clarissa. I didn’t do that with the first bag and noticed it was hard to keep track when tracing. The other thing that takes a little planning is marking the ends of the lines for the pieces that are just curve templates for corners. Since these pieces are open on one side, a decision has to be made about how to cut around them. I found that drawing a defined perpendicular line at the end of the curve, then cutting a ways outside of that, helped. This was especially useful when the piece had to be put upside down for the opposite corner.
The fabric for this purse was just more left overs from making aprons. It is a reason to save the smallest of fabric leftovers. The flowers were even pieces from other aprons. The book has examples of the outside of the purse made from more than one fabric and it doesn’t look patchwork, just stylish. It would be a good project to let a younger, budding seamstress with a limited budget have fun with.
I may be blind, but I still haven’t found reference to seam allowance. However, the instructions for this purse, the Clarissa bag, and how the pieces fit together indicate that 5/8 inch is the standard for the whole book. I’m going to make notes at the beginning of the book, in the section about sewing terms and where how to use the patterns is explained.

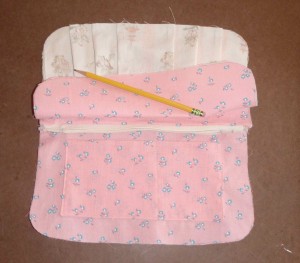
One of the fun things about sewing a few bags in a row, is that I am beginning to get ideas about how I can add pockets that aren’t part of the original design. This little purse is barely a pocket by itself, but there was still room for a double open pocket. I used the basic lined pocket construction from the section about pockets in “useful information” near the beginning. I measured the pocket pieces so that they would be clear of the seam lines, and I divided the pocket with an off-set seam down the (not exact) middle. I am generally against too much symmetry…
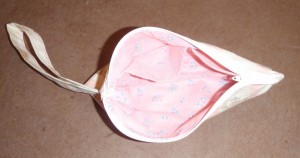
Reinforcing the seams with a narrow zig zag stitch, then trimming, worked well for this purse, too. The main problem I had was that I missed the directions about leaving a 1/2 inch free when sewing the layers to the zipper. (I have now highlighted this in the book) I had to

undo some stitching to make things go together correctly when sewing the outer edges of the purse. When I was done, the zipper ends seemed a bit too loose and ready to come out, so I put my size 16 sewing machine needle to good use and tacked the whole end of the zipper through all the layers from the outside. I think I need to sew over the ends of the zipper more thoroughly from the inside next time.
I actually made the larger version of this purse. It strikes me as handy for a shopping trip where you don’t want a big purse in addition to purchased parcels. The smaller version would make a cute money purse or coin bag. I gave this first one away, but hope to make one for myself sometime.
