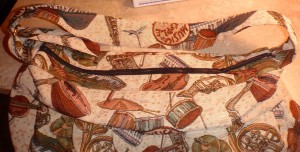
I have been collecting bag making, or cloth purse making, books for a couple of years now. I’ve probably looked through them all 10 times, making notes and planning. It was hard to narrow it down to which one I wanted to make first! (I have made some grocery bags, but that isn’t quite the same) Finally, with a daughter’s 19th birthday a couple of days away, I decided on Sue Kim’s urban carryall bag for her, from the book: Bags–The Modern Classics. This bag is fashionable without being too complicated. I like lots of pockets and zippers, and will get around to some of those bags, but this was a good one to start with.
I always read through instructions before I begin to sew, but the real test is when the actual sewing is being done. Something that makes sense in the reading may be more complicated when in the midst of the project. Conversely, something that seems confusing may become clear when the project is in hand. The directions for the urban carryall are marked as the highest level of difficulty in the book. However, if a person has a few years of sewing experience, none of the bags should be more than an “intermediate” level of difficulty. For the less experienced seamstress, there may not be quite enough explanation for it to be considered easy, but nothing is missing or wrong. The pictures are good, but small for my aging eyes (even with reading glasses). Also, I think it would have been helpful to use a different combination of fabrics to photograph various steps, just to make it easier to tell which pieces were which.
One of the things that will make a difference is the type of fabric chosen. My daughter was interested in me using a tapestry-like fabric that someone had given her as a graduation gift. This was definitely on the thick side for certain steps of construction. I don’t recommend it unless you are used to working with heavy duty fabrics or have already made the bag once out of a lighter weight fabric. Below are a few extra hints and photos from my experience making this bag –
- After one piece is cut for the back of the bag, it makes a good pattern piece to cut out the lining.
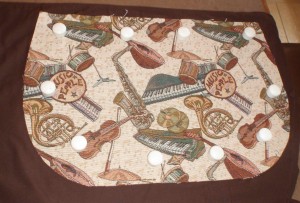
- The instructions call for a 19″ zipper. One of my goals was to not buy anything to make this bag, so I opted to use an 18″ metal zipper I had inherited from a grandma’s sewing stash. It was just barely long enough to catch the fabric ends of it in the handle, but I am satisfied with it.
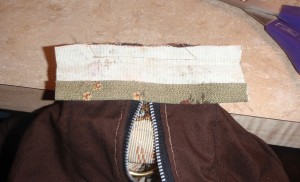
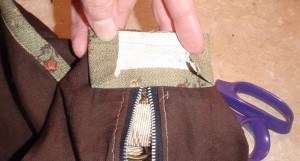
- I thought one more photo showing how to put the zipper in would have been useful, so here is one of mine showing the attachment of the back to the zipper after the zipper is already encased between the front bag and lining. The wrong side of the outer bag is showing. It is folded out to show how the zipper is pinned to it, but it will be folded out of the way for sewing.
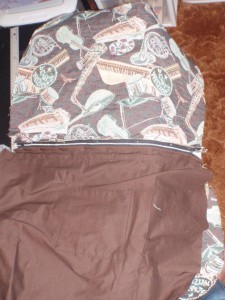
- I could not find specifications for standard seam allowances, although for things like zipper attachment, top stitching, and seam trimming measurements were given. Based on the instructions for pocket making at the beginning of the book, I decided to use a 1/2 inch seam allowance. This worked out fine.
- I had a length of bias tape left over from apron making that coordinated nicely with the tapestry look of the bag. It is heavier material than store bought bias tape, so by the time I was done, it was like there was a wire keeping the shape of the bottom of the bag. I like this unexpected benefit. Tip: I have found that it is best to leave some extra bias tape at the end of a seam, because as it is actually sewed around the curve it often ends up shorter or longer than when pinned.
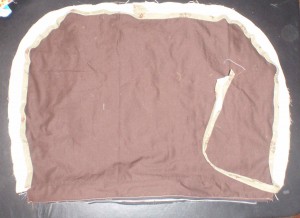
- I felt like I had more control with holding the bias tape over the raw edge to fold it under, then sewing on the side where the bias tape was already attached. This was probably due to the added thickness. There were a few small sections that didn’t catch, but I just went back over them from that side afterward.
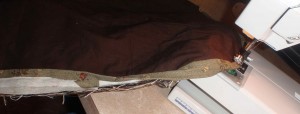
- The handle attachment was the most difficult part. I had been using a regular size sewing needle up until this point. Now, it broke and I put in a size 16 needle. My sewing immediately became more fun and I wished I had put it in sooner! I suggest that the loop and the long handle, on their respective ends of the bag, be basted to the bag before folding over the zipper panels.

- Since the zipper panels were intentionally left a bit long, they hang out over the rest of the edges once they are folded over. The added thickness of this bag made all of this less neat, but it still worked. I took care to catch the actual zipper fabric tabs in the seam when sewing.
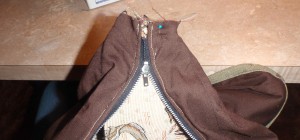
- This was definitely one of those times to not stew about lack of perfection. The author mentions this attitude in the beginning section of her book, so I knew I was going to like her. The most important thing was that it was all staying together and looked good on the outside.
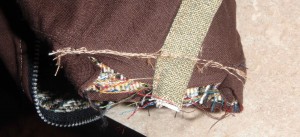
- I did end up sewing the handle seam for the long handle a little further in. Not all of the fabric had gotten adequately captured in the seam. I decided it made more sense to adjust the seam depth by a generous 1/8 inch, rather than undo the seam. This worked and the discrepancy between the two sides is not noticeable.
- The bias tape tab covered all the raw edges. Although the written directions got me through this, it would have helped to have a couple more photos.
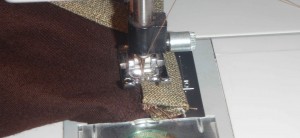
- This time, I did sew on the newly folded edge of the bias tape. I also decided to sew around the whole edge of the tab, to secure the folded but open ends.
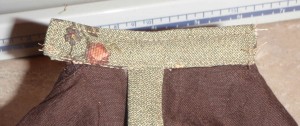
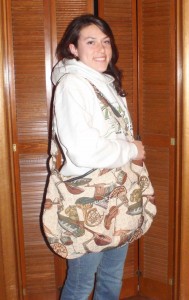
- The handle length was going to be left as long as possible. This seemed best for college student shoulder slinging, that might include diagonal-over-the-head-and-neck options. Thus, the long strap free end was sewn down at a distance that mirrored the loop length. You can see how this looks on my 5 foot 5 inch daughter in the top photo.

There are several other bags in this book that I would like to make. If the instructions for them are as good, it will all be very fun. I’m in a bag making mood, so many people I know will be getting them as gifts this year!! 🙂
