If the frost hasn’t hit yet, you are probably torn between 1) wishing your garden would vanish in a swift, complete act of nature and 2) beginning to already mourn the dearth of fresh backyard tomatoes. In our climate, we have to plant for being bombarded with produce so that we can try to preserve some for winter. Okay, maybe we don’t have to, but many of us do, so we are worn to a frazzle by September.
One way to moderate the frazzle, and have more fun with your winter storage prep, is to use a variety of methods to preserve things. This can mean getting dehydrating going for something for a few hours while we freeze or can something else. Sometimes it means we can be applying more than one type of process to the same vegetable.
Like tomatoes, for instance. How many ways can you put by tomatoes for the winter?
- canning, whole or pureed
- dehydrating, slices, pieces, or leather (or crumbles)
- freezing, which can be a good back up for the occasional failure with the first 2 methods
- storing in moderately cool temperatures for a few weeks from harvest just before the last frost
CANNING:
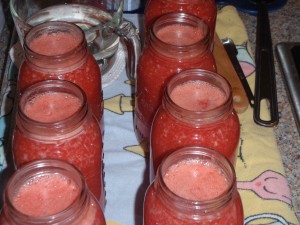
I like to puree my tomatoes for canning. This saves time in the canning effort because I just leave the skins on, core and quarter, then puree. Heating the tomato puree to put in the jars is faster and more uniform than dealing with whole tomatoes; plus, it seems easier to determine how much I need to be preparing for each canner load. In the midst of all that needs to be done, I can’t see straining seeds or cooking it down to thicken it. I’ve tried it and it takes quite a while.
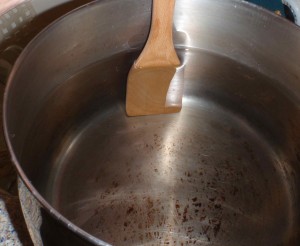
Calibrating the pot and a wooden spoon for tomato puree volume helped me this year. I filled the pot with water equal to 7 quarts (the number of quart jars my water bath canner holds). Then, I found a wooden spoon that I didn’t mind having some black permanent marker on, a spoon that isn’t all that useful for daily cooking. I dipped it straight (perpendicular ⊥ for you geometry lovers out there) into the water until it touched the bottom of the pot, then I drew a line at the water mark. Using the blender to puree the tomatoes tends to make them foam up some, so I stirred them down and heated them before making a final determination about the volume. Then, I added a bit
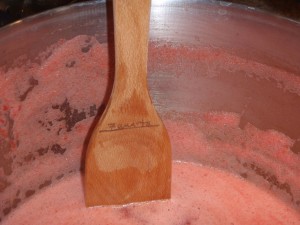
more puree, because there is nothing quite so frustrating as filling up 6 and ¾ jars for canning, then needing to take extra time to specially prepare that last little bit!
Opening a jar of pureed tomatoes also makes it easier for me to use the tomatoes for cooking. We use them most often for spaghetti, soup, and anything stew like. My husband is a tomato lover, and can’t seem to get enough of them! Which leads to my next method.
DEHYDRATING:
My way of thickening up the tomatoey-pot-of-whatever-it-is, is to add some version of dehydrated tomatoes. Last year, I used the sliced dried tomatoes. (Which also just make good nibblers while cooking. This coming from a person who doesn’t really care for fresh, raw tomatoes unless they are in something like tacos.) The dried slices absorbed some of the liquid from the jarred tomatoes and turned into flavorful, but not overly strong, bits of tomato. It was a hit with everyone.
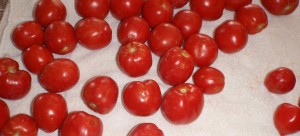
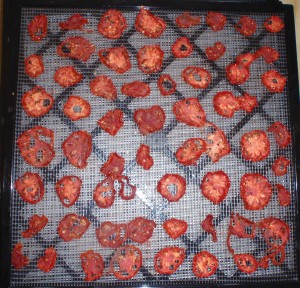
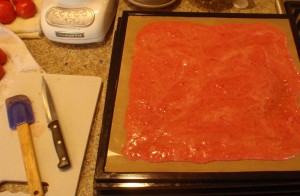
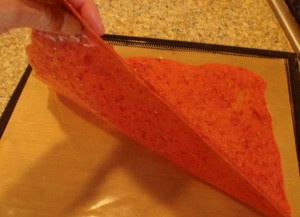
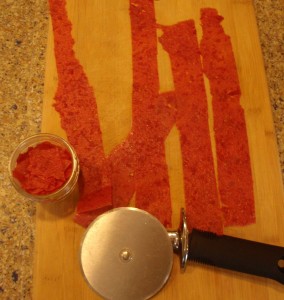
It takes quite a while to slice all those tomatoes, so I made some tomato leather this year. One batch ended up kind of crumbly, so I expect it to mix into any tomato based recipe much like tomato paste. The other loads of leather were more like fruit leather. I can’t think why they wouldn’t thicken things up similarly to the slices, but we shall see. I just tore the tomato leather up to fit in ½ pint jars. In prior years I have rolled any fruit leather in plastic wrap, which I find a horribly tedious process. Then, I am discouraged from eating it because it is so hard to unwrap! Not a good combination. I think I will try the tear and vacuum seal in a jar method for fruit leather next time.
MaybeI just like the roar of the blender, since that is what I use to prepare the tomatoes for drying as leather. However, it did seem that I was not able to use as many tomatoes per dehydrator load this way. Next time, I suppose I should actually weight them as I go along to really know. Since the slices were ¼ inch thick, but the puree needed to be ⅛ inch thick. I don’t think the mashing filled in the spaces enough to make up the thickness difference. At least, it didn’t seem to make as much of a dent in my pile of tomatoes.
FREEZING:
Freezing tomatoes is a last resort for me. I need the freezer space for other things that don’t handle other processes as well. But I’m not going to waste jars that don’t seal or tomatoes that I accidentally don’t get dry enough. One year, my husband smoked some tomatoes in his brick oven, but they stayed pretty plump. They went into the freezer. I guess you could also say that I freeze tomatoes when I freeze extra spaghetti sauce or soup to save for a later meal.
SEMI-FRESH STORAGE:
The home gardener has one advantage over the farmer trying to store tomatoes. Our tomatoes don’t have to travel very far. If they are picked before a frost, in a stage of ripe enough green, they can ripen gently indoors before they rot. A cool (not below 50°F), semi-moist place without much light will keep at least some of the ones that you are trying to hold. Some people wrap them in newspaper, but I have never gotten around to that. Of course, there is always the chore of checking to remove spoiled ones before they stimulate spoilage in neighbors. To ripen, simply bringing the tomatoes to a warm kitchen will start the ripening. Then, come December, you can begin to mourn fresh tomatoes in earnest, while you snack on dried ones and make lots of soup. It is a vicious circle.
If you have any tips for tomato harvest, feel free to add them in the comments. I also recommend the book Root Cellaring: Natural Cold Storage of Fruits & Vegetables to learn how to store many garden vegetables without unnecessarily processing them.

