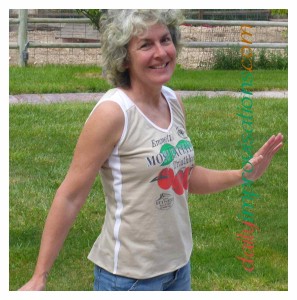
If I am going to be able to enjoy my race shirts more, they have to be in a form that is a touch more feminine. I am not faulting the race directors. In fact, I would not want to pay more for the race just to have a prettier shirt. I’m not even convinced that I want to pay for a race shirt. Most of the time they just come with the package, so I enjoy them when I can. However, I don’t have a lot of times that I want to wear a boxy t-shirt. (click on any photo to enlarge)
In the past, my girls and I have simply cut the necks and sleeves off, creating a loose work-out tank top. Generally, the knit does not unravel, but curls a bit, lending itself to the look of a muscle shirt. That’s fine for running or painting, but not my choice for nicer occasions. If I’m going to have race shirts, I would like to be able to wear them with more fashion flair!
For my first experiment with altering one, I decided on a tank top. This would seem to be straightforward, but right from the start, there was problem solving.
- What would I base the pattern and sizing off of?
- How would I cut the race shirt so as to preserve the display of race information?
- What was the best neckline shape and level?
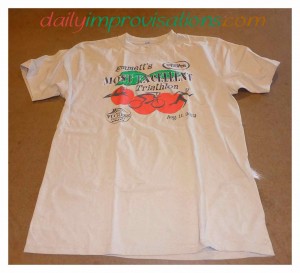
I thought of using a tank top from my own closet for the pattern, but decided they were all stretched out too much. In retrospect, that still would have probably been the easiest way to make a base pattern. Even with the sewing pattern that I had in my stash (but had never sewn with before) I had to keep adjusting the shirt to make it fit. If I had a tank top sewing pattern I was familiar with, it would have been nice.
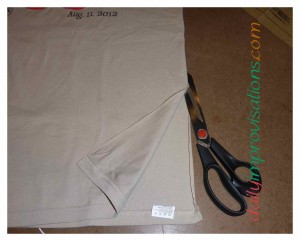
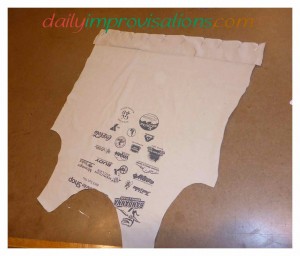
Still, one must begin somewhere, so this I did. I laid my chosen race shirt out flat, making sure the sides were square. Then I cut it up the sides of the shirt, around the sleeves, and up around the ribbing that makes the neck opening, trying to create as big a piece of fabric as possible. I was careful NOT to cut the neck ribbing, because it occurred to me that I can use that to make easy slip-on bibs for grandkids.
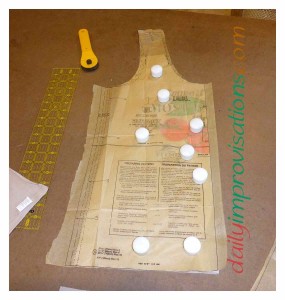
Next, I took the pattern piece for the front of the tank top and positioned it over the once-front of the t-shirt. I could see through to the former shirt. It was apparent that I would have to be come up with a way to add straps to my tank top if I wanted to cut the front of the tank top so that the race logo/picture/date would be on the tank top front. To put it another way, if I simply cut the whole front of the tank top out of the front of the t-shirt, a lot of the design would be the part cut out because it was placed too high on the front of the t-shirt.
Moving the tank top pattern piece like that, also meant that I was working at a narrower part of the t-shirt for the portion of the tank top that goes across the widest part of my chest. Specifically, it meant that I either had to fudge the underarm curve or find some fabric to add. I chose to add side panels to my tank top. I did not know what fabric I would use yet. I decided to cut the front and back pieces of the tank top out and see what was left of the t-shirt. It turned out there was nothing long enough for side panels.
Cutting the back out was a little easier than the front. I was able to move the pattern piece down to the widest part of the former t-shirt back, since I wasn’t concerned about any of the advertising there. (Sorry, guys) Strangely, even though I had a big piece of fabric, the shape was just enough different that I ended up with the back of the tank top being cut a few inches short. Right away, I noticed that cutting the front had left me with a piece to easily add to the bottom of the back.
Please note that all seams were 1/4 inch wide. I sewed using a narrow zigzag stitch, with light presser foot pressure. This had the combined effect of giving the finished garment some stretch for wearing, but not stretching it out as I sewed. I pushed all seams to one side and top stitched all them with the same narrow zigzag stitch. This helped them to lay flat. I will mention particular sewing tips for the neckline and armhole binding later.
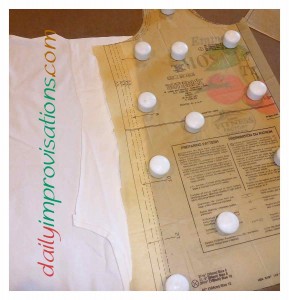
Fortunately, I had a stash of old knit shirts that I could use for piecing in the side panels and upper shoulder straps. These shirts are old in that no one seems to want to wear them. The fabric is in very reasonable shape. So, I found a light cream colored one that I thought would coordinate with the light brown of my race shirt.
I took one of these impromptu scraps and folded it in half, then trimmed the edges of one side very straight so that I could lay it up against the edges that I had of the front of my tank top. Then, I carefully pulled the side panel knit under the tank top front piece so that there was an overlap of 1/4 inch. This would be my seam to sew them together. With this all in place, I cut out the sides of the panels to fill in what was missing from the sides of the front tank top piece.
More of the light cream colored fabric was placed strategically where I could add it on as extensions to the should straps.
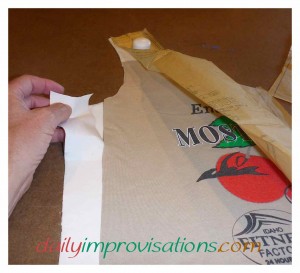
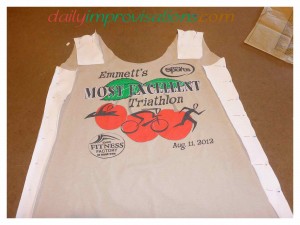
In order to avoid unnecessary confusion, I immediately flipped the side panel pieces and shoulder extensions, and pinned them right sides together to the tank top. I sewed them in place using the stitching referred to above.
I had already sewed the piece needed to make the back of the tank top the correct length, so it was time to do the preliminary stitching to put the main pieces together. I stitched the side seams and shoulder seams. I reminded myself to NOT do the top stitching until I had tried it on and made adjustments. This is very important.
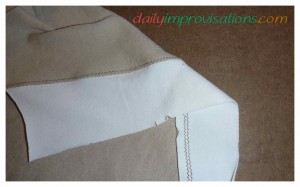
It turned out that it hung too low for my taste. I still needed some of the strap extension, but not all of it. I eye-balled how much I needed to take up and sewed it into place. When I tried it on again, I verified that the underarm seam was not pulling up too tightly due to this change. So far, so good.
Now, I decided it was best to work on the neckline. The old shirt I had picked to cut scraps from turned out to be a happy accident. It had a larger neck opening, with a v-neck ribbing. I could use that ribbing for my re-fashioned race shirt. I had cut the ribbing with the seam still on it, where it had been sewn to the other shirt. I opted to leave that there as extra seam allowance for sewing it to my new shirt, wondering a little if it would end up too bulky. It didn’t. In addition, the “v” of the ribbing was subtle, so it was not difficult to make the more circular neckline of my new tank top accommodate it. I pressed the seam allowance toward the tank top and top stitched it in place. All of the bits of cream contrast were coming together nicely!
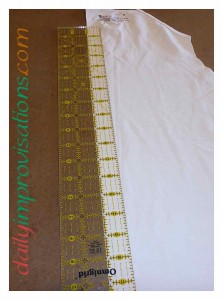
I wasn’t sure what I wanted to do for the armholes. I was afraid that just trying to hem them would stretch them out too much. Since the ribbing on the neck had gone so well, I decided to make a knit binding for the armholes from the main fabric of the light cream colored scrap shirt.
The measurement of each armhole circumference was 18.25 inches. I cut two pieces of the binding fabric an inch wide and 15 inches long. This was admittedly a guessitmate. I knew that I wanted the binding to pull the armholes in a tad, but I didn’t want them gathered or puckered. My choice turned out wonderful.
As is standard for such binding, I first sewed each piece short ends together, forming a continuous circle. Then, I folded them in half lengthwise, and finally placed pins in them that marked them divided into four equal sections. I also marked the armhole opening in four equal pieces. I pinned the binding on, right side of tank top to one side of folded binding, with raw edges of both even. This is best started by matching the seam of the binding to the lower underarm of the hole. It is helpful to pin the four main corresponding points first, then pin in between those, stretching the binding slightly to fit the armhole opening edge. At last, I sewed them together using a 1/8 inch seam allowance, because I could see that anything larger would leave me with too little binding unless I just wanted to fold it under. Part of the trick with sewing this is to stretch the binding, but NOT stretch the main armhole, since the stitching might hold that stretch in place and then all would be misshapen. Note to self: cut armhole binding pieces about 1.5 inches wide next time.
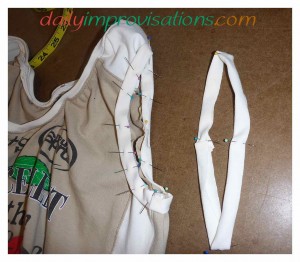
Once I had tried on the new tank top again, to see if the armholes still felt and looked right, I topstitched the binding down, as I had all the other seams. Then, I hemmed the tank top bottom edge with a simple one fold over 1/2 inch hem, using the same narrow zigzag stitch.
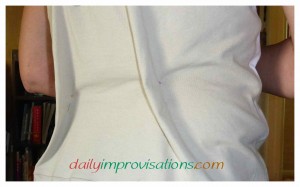
It was time to decide how loose I wanted the new tank top to fit. While it fit perfectly through the shoulder area, as usual, I was dealing with it being kind of loose from the waist on down. While wearing it, I held tucks in it in various places to see what could be done. Anything done in front would mess up the race shirt logo I had been working so hard to save. It seemed my only option was to do something to the back.
I asked one daughter her opinion and she voted for darts, saying that just gathers would not be as comfortable. Since I know that I usually look better in more closely fitted clothes, rather than gathered, it was an easy sell. I picked two places at the small of my back and pulled the fabric in while looking in a mirror. When I was satisfied, my daughter pinned them in place for me.
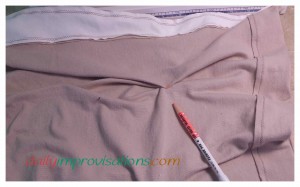
Back in the sewing room, I needed to draw the darts. Having the tank top turned wrong side out on the table in front of me, I marked the fabric on both sides of the pins. When I took the pins out, I could see that the impromptu tucks were not horrible, but not perfectly lined up, either. I used them as guides to measure where I wanted the center and more curved part of the dart to be.
The marks indicated that the widest part of the dart should be 3 inches across. Having marked the width line at a location that agreed somewhat with the original marks, I estimated that the dart might work if it was 8 inches long. I will mention right here that that was not long enough and too abrupt for dealing with tapering that. Regardless, the same method I used fo marking and sewing it is valid. When I saw that the ends of the darts puckered too much, I extended them by positioning a straight edge at the fattest part of the dart, then tapering it for about 10 inches so that the end point would fade into the garment.
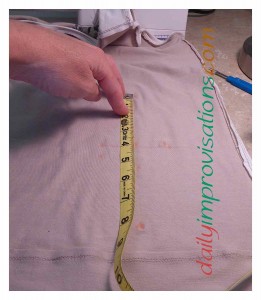
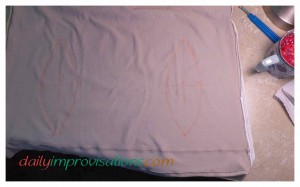
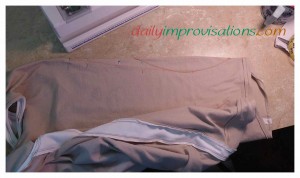
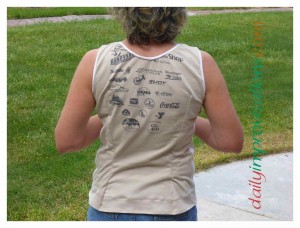
I did this for both top portions of each of the darts first. Then, I tried the tank top on to see the results. Much better, but the bottom part of the darts still needed to be tapered. I didn’t have as much fabric at the bottom of the shirt to work with. Still, I managed to taper enough to make it all lay well.
A light pressing of the seams and fabric proved useful in making everything lay in a more tailored way. Unfortunately, this is when I discovered that the race design does not seem to be heat proof. I only smeared a little bit of green before I noticed, but I will definitely keep this in mind for future projects.
