Daily Improvisations

  • Inside the Homestead
    • Sewing
    • crochet and knit
    • Playing House
    • In the Workshop
    • Cooking and Food
    • Helpless Female
  • Out in the Garden
    • In My Greenhouse
    • Gardening in Southwest Idaho
    • Straw Bale Garden Project
  • Out with Animals
    • Chickens
    • Goats
    • Horses
  • Around the Globe
    • Adventures with Wild Greg
    • Chocolate Shops Around the World
    • Life in Taipei
    • About Town
      • My Blogs
  • The DI Store
    • DI Gardener’s Shop
    • How to Build a Backyard Brick Oven From Scratch (Book)
    • Custom designs
  • DI Memberships
    • Log In
    • Sign up to be a DI Sewing Room Insider
    • Dream House Members Area
      • Dream House Eyewitness Login
      • Your Account
      • Dream House Project
    • Become a Dream House Eyewitness!

How to Make a Scalloped Edge Oval Table Cloth

February 27, 2015 by Laura Blodgett Leave a Comment

I had a large scrap of decorator fabric that fit over my small oval table. I put it on the table upside down, centering it for maximum coverage and a few inches to hang on all sides. I made sure it was pressed enough to work with. (click on any photo to enlarge)
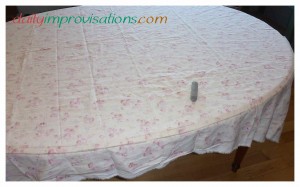
Black chunky sidewalk chalk worked very well to mark my fabric. I think I have found a new, inexpensive marking option.

A piece of black sidewalk chalk was perfect for tracing the outline of the table top onto the wrong side of the fabric, which was basically white. Since the table has a wide vertical edge all around, I also pushed the fabric against that edge and traced a sketch of it as best I could, needing to occasionally adjust the fabric so that it still hung straight down.

The fabric was transferred to my long kitchen table, that was covered by my custom fit cutting mat. With limited fabric and unequal amounts available at certain edges, I used a flexible ruler to form a scalloped shape on one corner. I again used the black chalk to trace this. I cut it out with a rotary cutter.
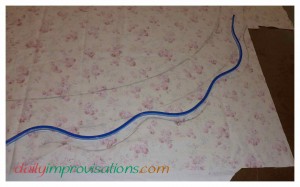
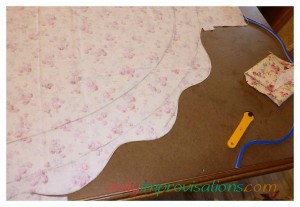
Working out the scallops around the first corner.
The first corner was done before I decided to do the basting around the outer edge of the table cloth.

I could see it would be useful to have the markings not be brushed off, so I used an easy to see red thread to baste long stitches all around this outer line.

After cutting out the corner scallop section with the rotary cutter, I folded the fabric in half lengthwise. This let me match the lines of the red basting and decide how to apply my scallop design to the other corners. I was able to follow the first scallop cut fairly closely on all the other corners, depending on the allowances I had. If I had been starting with a piece of fabric cut for the purpose of fitting this table, I would have been able to plan for this. However, I decided that the piece of fabric was close enough, I had it on hand, and that no one would be looking at all sides of the table cloth at once anyway.
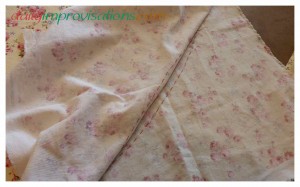
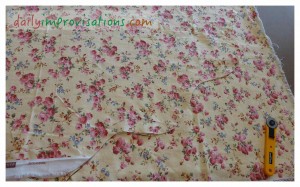
The red basting defined the shape of the table markings better and more permanently, so I could fold and iron as needed without loosing my marks.
Following the original corner scallops to make the other corners.

Once all the corners were shaped, I used the flexible ruler again to imitate those first scallops on the ends of the table cloth.
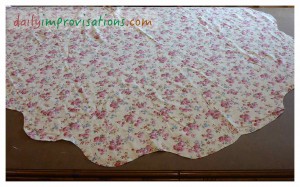
This end was a bit blunted, but it isn't noticeable later when it is a ll done and on the table.
This end was a bit blunted, but it isn’t noticeable later when it is a ll done and on the table.

It was possible to get slight scallops on one long side of the table cloth.

Lastly, I trimmed the one long edge that would end up straight.

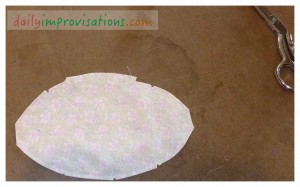
Centering a table cloth is frequently frustrating for me, so I brainstormed about how I might do it with this one. I traced the bottom of an oval casserole dish on the wrong side of a scrap of the table clothe fabric. I found a light weight cotton to use as lining and cut them both out together. I sewed them right sides together, leaving about 3 inches open on a long edge for turning later. I trimmed the seams to about 1/4 inch, cut the pointed tips off, and cut notches in the curves so that it would lay better when turned and pressed, which I did next. Then, I folded the table cloth again and marked the center of the table cloth with the black chalk, on the right side this time, as that is where I needed to see it and it would get covered with this centerpiece.
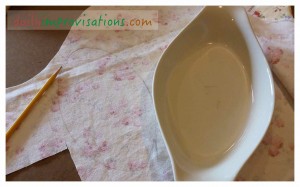
I found an oval shape that I could trace for my center marker piece.
Here the center piece and its lining are sewn together, but still wrong sides out.

It was a good time to remove the red basting, but I just did it as I was making the narrow hem around the outer, scalloped edge of the table cloth. I was originally thinking it would be useful to use bias tape to hem it, but I didn’t have any and I wanted it done that day. I can go back and cover the edge with bias tape. I also plan to make a filet crochet trim to sew on the edge.
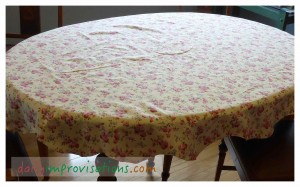
My new scalloped edge oval  tablecloth is done enough for now - crochet edging pending.
My new scalloped edge oval tablecloth is done enough for now – crochet edging pending.

Filed Under: Inside the Homestead, Sewing Tagged With: sewing

Leave a Reply Cancel reply

Your email address will not be published. Required fields are marked *

Don’t fight the weather and environment. Discover how to wield their moods and energy to your own advantage. — Learn to plant the right seeds at the right time. — Your neighbors will be in awe and your taste buds will be delighted!

About me


Daily Improvisations is a project by Laura Blodgett

If you want to know more about what I’m up to and where to read about it, here is a summary!

Making sure you know that:

Some of the links on this site are affiliate links, including affiliate links to amazon.com. See disclosures here.

Contact Me

Contact Me
First

All pictures and content including the name and logo “Daily Improvisations” are Copyright (c)  by Laura Blodgett, unless otherwise noted.

Tags

animals Backyard Oven backyard weeds book reviews Chef Betharoni chickens Cori Lou Costa Rica crochet and knit decorating even I can do dehydrating fabric stores around the world flowers flowers from seed Gardens Around the Globe helpless female homestead injuries insects interview Maui music organizing poems PVC Pipe Projects questioning the establishment recipes restaurant reviews sew sewing sourdough southwest Idaho gardening sprinklers stock market diaries Taipei Taiwan technology know-how The Best Little Chocolate Shops tools and equipment underground house unimpeded parenting Wild Greg Adventure

Copyright © 2025 · Beautiful Pro Theme on Genesis Framework · WordPress · Log in