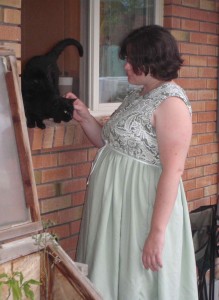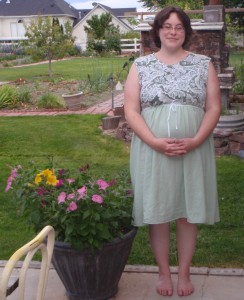
Pregnancy embodies (pun intended) a major factor in femininity. A human can only be “with child” if she is female. Yet, somehow, the state of being pregnant can make a woman feel less than feminine. Maternity clothes often don’t help. They can make the wearer feel like the center pole in a tent. Or, sometimes, the effort toward cute ends up looking foo-foo. Ruffles and bows at certain angles can be a bit too eye-catching.
The fact that the baby keeps growing may be exciting, but it also makes dressing a daily challenge. The pregnant shape exponentially increases the possible variation in a woman’s figure. But who wants to put too much time or money into clothes that might not work next month or ever again?
When my daughter’s baby bump began to limit her wardrobe choices, I wanted to sew a fun summer maternity dress for her. It wouldn’t do to have it be a 10 year project, like the living room drapes… so I began brainstorming and remembering. I had had a favorite lavender dress during my pregnancies. What had I liked about it? What would I have changed?
Here is my list of desirable features:
- easy and quick to sew
- easy to duplicate, after I learned some things
- easy to adjust for changing size and shape
- cool for summer
- light weight, both for regulating body temperature and who needs extra weight to carry around at this point
- feminine without being cutesy
- suitable for multiple venues, i.e. office, shopping, home
- inexpensive
- Use a regular non-maternity t-shirt or tank top pattern for the bodice.Make sure to find a size for current bust measurements or slightly larger. Choose a loose (comfy), but not baggy style. A store bought shirt might be a good option.

I did alter the shirt pattern to go straight down, instead of curve in. - Choose a knit fabric for the bodice that has enough stability to keep its shape when a skirt is attached. Even with a light weight fabric, a couple of yards of it are going to feel the effects of gravity.
- Don’t forget to use a narrow zig zag stitch for sewing on the knit, but don’t stretch it as you sew.
- If you want it sleeveless, keep in mind that the increasing bust line may make the opening gape some. Try it on before finishing the edges and don’t be shy about patch working in some pieces to cover where you want to.
- Buttons and zippers can be avoided with this approach, but the neck opening, in particular, needs to be large enough.
- If you want to adjust the size of the arm and neck openings, or just do away with facings that tend to flip out, bind the edges with homemade binding.To do this, cut a one inch strip of your knit (or ribbing) of choice that is about 2-3 inches shorter than the perimeter of the opening. Have the stretch go the long way of the binding.

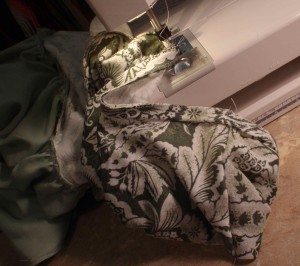
a straight edge and a rotary cutter work great for cutting strips like this armhole binding Sew the short ends together, then fold it lengthwise (wrong sides together) and baste fairly close to the edge. Pin these raw edges along the raw edge of the opening being finished, right side of opening to binding. It is helpful if both parts are marked in quarters with pins first. Hopefully, you will have to slightly stretch the binding to fit. If not, you might want to make it shorter.

I have just started the top stitching, and you can see how I sewed the binding along the middle in the part that isn’t folded under Sew a seam in about the middle of the binding using that narrow zig zag. Next, turn the binding seam to the inside of the garment. To hold it in place, top stitch the outer edge of the garment, about 1/8 inch from the seam.
- Cut the bodice so that it is long enough to gather under the bust, plus enough for seam allowance.
- Choose a flowing, light weight fabric for the skirt.
- Measure the lower edge of the bodice front and back pieces. They will probably be very similar. Multiple the measurement of each by 2. Decide how long you want the skirt to be. Cut each piece to those dimensions. For instance, if the front bodice measures, 16 inches and you want the skirt to be about 30 inches long, you want a rectangle about 33 by 31 (leaving some extra for seam allowances, which can be anywhere from 1/4 inch to 5/8 inch depending on what is easiest for you to work with). The bodice pieces may be designed to be cut on the fold, so take this into account.
- You may want to experiment with how much you multiply your measurements, depending on the type of fabric and the look you are going for.
- Sew the skirt sections together at the sides. If the fabric is prone to fraying, it might be a good idea to do a simple double fold hem at this stage. It’s not like the hemline is going to be unchanging.
- Divide the skirt top edge in 4 sections. Prepare it for gathering by sewing a long basting stitch in 2 rows, one just inside the seam line and another about 1/8 inch inside of that. Leave the threads at the end long.
- Mark (with pins, pencil marks, anything that won’t show or bleed into the rest of the dress) the lower edge of the bodice in 4 equal sections.
- Pin the bodice to the skirt, wrong sides together, adjusting gathers to fit and having side seams matching. The gathering doesn’t have to be perfect to look good in the end.
- Baste together using a medium long stitch first, then examine to see that it is all connected right.
- Sew the seam now with a regular stitch. After that, I always reinforce by doing a medium width zig zag stitch in the seam allowance, kind of close to the seam. Then, I trim the seam, press it toward the bodice, and top stitch along the bodice. With the knit, I even use the narrow zig zag for the top stitching to that there is less popping out of threads later.
- Choose a way to be able to “cinch” the dress under the bodice. I cut a piece of twill tape long enough to be able to have it tie in front. The twill tape is strong, the white coordinated with the fabrics, and it isn’t bulky. I sewed the twill tape at the center back of the bodice with a zig zag stitch for about one inch, going back and forth a couple of times.

twill tape attached to the back of the adjustable maternity dress To make whatever is used for a tie stay in place better, a couple of narrow belt loops could be placed at the side seams. Or, for an even more finished look, a casing could be made on the outside of the bodice, just above the skirt seam. I would sew this casing on BEFORE I attached the skirt, making sure to keep it up high enough. A narrow gross grain ribbon or any cord that will stay tied would do.


