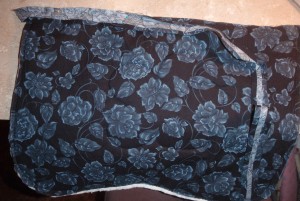
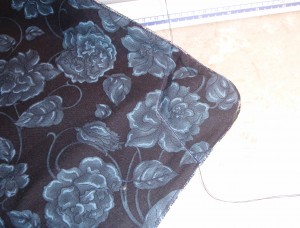
Heidi loves books, which I take some responsibility for. And she is a computer geek, but no thanks to me. I knew her birthday bag needed to be big enough to carry a few books and a laptop computer, without tempting her to injure her shoulder toting the whole library. It would be a balancing act of providing a satisfying bibliophile packing experience and staying within the limits of human joint physics. I chose to make her a bag based on the Smart School Bag in Sue Kim’s book Bags–The Modern Classics.
Because the lines of the bag are simple, this was the perfect time to use a piece of thick tapestry fabric that I’ve been saving for years. To keep the weight of the bag under control, I used a light weight woven cotton for the lining. While the directions for cutting out the fabric were a tiny bit confusing (partly due to the visual arrangement of the diagrams), the directions overall were easy to follow AND to modify. I added several pockets and dividers, again mostly based on techniques learned in The Bag Making Bible.
The shoulder strap ended up being quite a bit longer than is shown in the photo in the bag making book. Either that strap was adjusted, or the strap was pinned up behind the model. (In the photo the bag is sitting on a ledge next to the woman, and not hanging.) At our house, we like bags that hit at about the hip when carried, but this one was hanging significantly below my hip, on my 5 foot 9 inch frame. It was easy to fix, but would have been easier to check for fit before finishing.
Here is what else I did along the way to make sewing this bag fun for me, and useful for Heidi when it was done:
- I drew the dart lines on by folding, then tracing along the edge of the markings on the corner template. The tracing wheel method was NOT going to work on the textured tapestry. I went ahead and used black Sharpie marker for visibility, but then made sure to sew just outside of that line, in case it bled through. (click on any photo to enlarge)
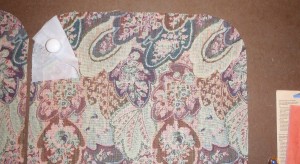
I just folded the corner template from side to side along the dart markings, then traced it. (curved corners are the bottom of the bag) - I cut away the middle bulk of dart in the outer fabric, but not too close to the point.
- I made a padded divider that would be sewn into the side and bottom seams. To find the shape for this, I took a side that already had the darts sewn in. I placed it on some paper, letting it box up like the darts are designed to do. I traced the outer edges, assuming this would be very close to the final dimensions of the bag. This became my pattern piece for cutting the divider pieces: 2 of lining, 1 of padding. The padding was some left-over quilt batting, but I have used old mattress pads for the same thing. It was placed between the 2 lining pieces, wrong sides to the padding. To keep the layers from slipping around, I hand drew a simple, fat, 5 petal flower shape in the center of the divider. With all the layers pinned flat and smooth, I used a basting stitch to quilt through, back-tacking at the beginning and end. I don’t think this is “proper” quilting procedure, but I was going for stability. Then I basted all the outer edges of the assembled divider.
- I finished the top edge of the divider with a piece of bias tape binding made from the same fabric (Clover Bias 1-Inch Tape Maker).
- A zip partition pocket (see The Bag Making Bible) seemed like another good addition to the purse. It also made a nice slot for a small computer to be held in place. I finished the ends of the zipper differently than specified in the book directions, by sewing a folded piece of lining to each end of the zipper tab before sewing it into the pocket.

stabilizing and giving the pocket zipper a more finished look - The partition zipper pocket was basted to the divider. Then both pieces, as a unit, were basted to one of the lining pieces, although the zipper partition pocket does not go all the way to the bottom. Then, all of this was treated as one side of the lining during the rest of construction.
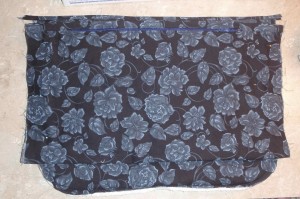
partition pocket ready to be sewn to sides of padded divider - There is one long piece of lining fabric, lined with the same fabric, sewn to one side of the lining; it was then sewn in 3 different places so as to create 3 separate basic, open top pockets of varying sizes.
- A flush zip pocket (similar to making a welt, see The Bag Making Bible for instructions) was sewn into the other side of the lining.
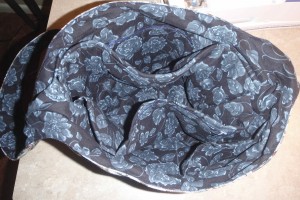
From the top of the photo: flush zip pocket, padded divider, partition pocket (doubles as computer harness), row of basic lined pockets - There is one larger flush zip pocket in the outside of the bag, in the side under the flap.
- I used large metal washers to weight the flap down (same as for the Annemarie Bag). Two washers were put in each corner of the flap before it was sewn to the body of the bag. With the zipper foot, I stitched rather close to them, so they wouldn’t jiggle around the whole flap.
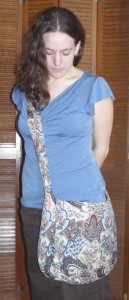
The bag is here being modeled by my 5 foot 4 inch daughter (Chef Betharoni). Fortunately, there is plenty of the tapestry fabric left over, because I am definitely having another case of “I need one of these for myself!”
