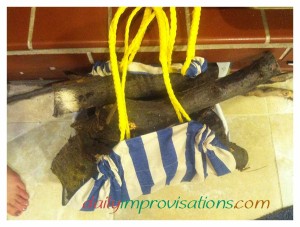
For some odd reason, I have always wanted to sew a firewood tote. It way always the handles that stumped me. I pictured that they had to be thick, wooden pieces; and I don’t do woodwork of any sort. I didn’t like the idea of plain fabric handles. When I saw my husband splice hollow braided rope recently to make my handles for my reusable leaf collection bag, I had an aha! moment. The leftover outdoor patio furniture fabric and the braided rope just might be what I had been waiting for all these years!
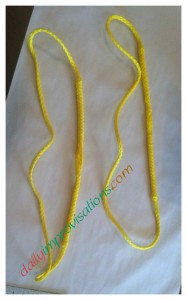
Of course, I was thinking my husband would make the rope handles for me, but then he had another business trip and I decided I was up to the uncertainty of trying to make the rope handles myself. I wanted to work on them before I did anything else for the firewood tote because the whole design was dependent on whether or not that worked. Lo and behold! I spliced two circular handles together in less than 20 minutes. I had only tried so I could say I had. I didn’t think I would be able to do it! I followed the instructions from a link he had showed me, but it also helped that I had watched him do it once. The instructions for doing a end-to-end splice are here. (click on any photo to enlarge)
To make my handles, I cut a length of 100 inches of hollow braid rope for each one. The idea was that the finished circle would be about 50 inches around. The extra length gets taken up in the splicing. I began the splice 20 inches from one end of the piece. One part of the instructions that was unclear to me was where it says “keep track of the exit point” after initially pulling that rope through. I just measure about 8 inches from the end of the piece I had just inserted. Then, I pulled it through the outer rope enough to make it easier to double back on itself, per the instructions. This was harder to do on the second splicing, since the rope was already connected, but it still was a good guideline. I ended up with two loops of rope that wanted to twist on themselves some. I don’t know if there is anything I could do about that, but it didn’t keep me from being able to pin them down for sewing into the casing. But that’s not until later.
Up until I started cutting out the paper pattern, I thought I would double the fabric for the main body of the tote. Then, I decided that the fabric was enough like a ripstop nylon that one layer might work. It would make sewing the handles more straightforward. Even at that point, the vision in my head of how to make it all work was a little fuzzy, but sometimes you just have to plunge ahead.
I estimated that the working dimensions of the firewood tote should be about 45 inches by 24 inches. I added roughly 6.25 inches on each end to the 45 inch dimension to give sufficient fabric to fold over for my circular handle design. Total length of fabric = almost 58 inches. Although the firewood tote needed to be within certain size limits, it didn’t need to be exactly fitted to anything or anyone.
My roll of paper was 25 inches across, so I cut the paper pattern that width rather than try to do a lot of straight trimming. I did want a paper pattern, both for future use and for ease of cutting the fabric out. I have found that just trying to cut the fabric with a straightedge is difficult to keep track of. Many fabrics, including this one, tend to slide. However, I did make the pattern “half” length, meaning I would cut it on a fold.
In order to get an idea of the casing size, I put the rope on an edge of the fabric and rolled it over the rope. It looked like at least 1.25 inches of total fabric would be needed to go loosely around this particular rope. What I forgot to take into account is that I was going to be folding the whole end of the fabric over, thus doubling the amount of fabric for the casing. It all worked out in the end, though.
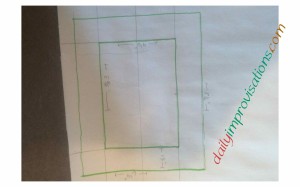
Next, I needed to figure out how to create an opening in the ends, so that there would be a place where the rope handles could be grabbed. I decided on facing them much like a big button hole. I put my hand down on the paper to measure how much space looked comfortable for a hand hold. That became two sides of a squat rectangle in the middle of the casing section. The other two sides of the rectangle were determined by the measurement I had left for the casing.
I used my L-Square Ruler to draw another box around that one. The ruler is about 1.25 inches wide. That would be the outer fabric allowance for my facing for the handle opening. The seam allowance for the inside was unimportant since I was just going to sew the whole squarish piece on, then cut out the inside.
In this case, rather than cut a separate pattern piece out, I tried to measure those smallish dimensions right onto the fabric. It just so happened that one of my leftover scraps was exactly the correct size in one aspect, so that was easy. I used the same L-ruler to mark the sewing line on the wrong side of the facing. I would use those corners to place the facing.
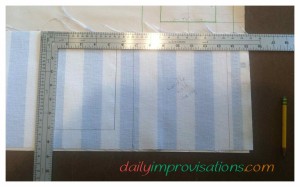
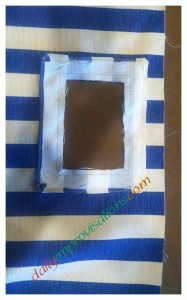
If I had been thinking, I would have finished the edges of the facing before pinning and sewing them onto the body of the firewood tote. But I didn’t. It wasn’t terribly hard for me to do it afterward, but it would be especially important for a novice seamstress to do this first. Otherwise there gets to be too much bulky fabric to keep track of while turning it around the needle. All that needs to be done to finish the edges is serge them or fold them over once and sew them down.
So, assuming that was done first, then it was time to pin the nearly square facing piece onto the main body of the firewood tote in the correct location. I folded the paper pattern along the lines that were part of the handle box. Then, I lined up the outer edges of the paper pattern to the fabric, and made pencil dots at the 4 corners, first at one fold, then at another. It was easy to see the green permanent marker through the paper. I attempted to make them just inside where I would be sewing, so that they would be hidden by the seam.
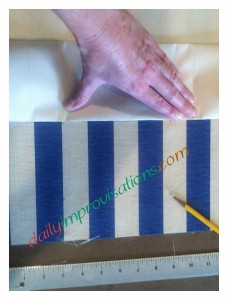
With the facing pinned securely, I sewed the square along the lines I had drawn on the wrong side of the facing. It works best to start and finish the stitching on a long stretch, NOT exactly at a corner. After that I cut into the center of the square and trimmed away the middle, leaving only about ⅜ inch seam allowance. Then, I carefully clipped into the inside of each corner, NOT cutting the stitching, but getting close enough that the facing would be able to turn to the outside.
What is called “under stitching” helped to make it easier to get the seams to lay open and straight. This means, holding the seam as flat as you can against the facing and stitching about ⅛ inch from the original seam. It can’t be done around the corner, so you have to stop and start. The ends of the stitching should always be backstitched for strength. When the under stitching was done, it was pretty easy to get the facing to turn and lay flat. Then, I top stitched it down. I didn’t know if sewing the outer edges of the facing down was going to be a problem, so I didn’t do it. I can see now it would not have been and would be a little neater, so I will do that if I make another.
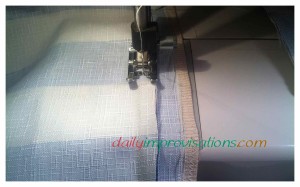
The long edges of the main tote fabric can be finished at any time. I did this with a narrow, double folded hem.
Making the handle facing, was the hardest part of making this firewood tote, and it wasn’t hard to do. The rest of the steps are just straight runs to hold the folded over ends in place. The end folds were made right along the edges of the handle openings, one on each end of the firewood tote. I sewed the very end of the 25 inch end in place, then I sewing it again about 1.25 inches from the end, or what is basically in line with the other edge of the handle (not the edge near the fold).
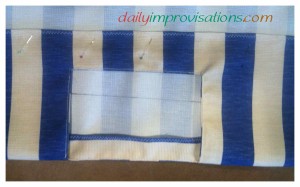
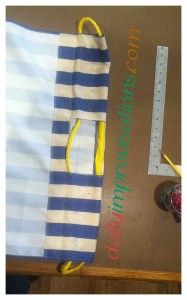
Now, I stuck the circular rope handle up into the space I had just created. I pinned down the middle of the loop, constantly checking and holding the rope to make sure it wasn’t twisting in there. It still wanted to twist, but it was not difficult to hold in place. Then, I sewed right up the middle of the loop until I got to the handle space. I back stitched here, then started the stitching again at the other end of the handle opening, back stitching. Basically, I back stitched everywhere!
And there it was! My long awaited firewood tote. My son was visiting and kindly went out in the cold and dark to fill it with wood so I could give a total report on how it worked. He said it worked best to lay it flat, put a long piece of wood on the bottom, fill it the rest of the way, then grab it by the handles. He thinks he could easily carry two of them full of wood, which means he could carry twice as much wood as if he was just trying to do it by the armload.

I have visions of finding some outdoor patio furniture in other fun colors to make more of these. I was able to make this one in about 4 hours, and that included brainstorming the pattern and trying rope splicing for the first time. I feel warmer just thinking about it. 🙂
