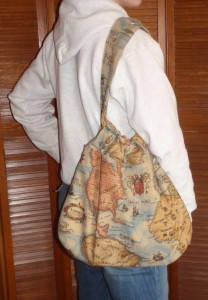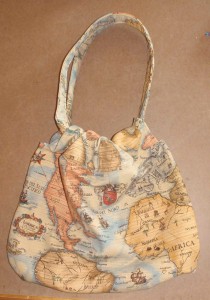
The book Lunch Bags! has instructions for 25 bags designed for transporting food. The hobo cinch bag is billed as a picnic bag, but looks more like a basic medium-sized purse than any of the others. Its longer straps also make it more versatile, and if you don’t want to look like you are carrying a lunch bag, it is certainly a good choice.
I decided to make it for a friend with several small children. Besides knowing it would be helpful have a bag made out of fabric that doesn’t easily show dirt or stains, I know that strap comfort is very important. A mom with kids often ends up packing any bag to maximum capacity, and it’s not the only thing being carried. The cotton webbing straps suggested in the book make the hobo cinch bag faster and easier to sew, but hopefully the padded straps will make it more comfortable and more likely to be used.
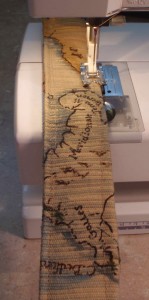
To make the padded straps, or handles:
- Cut 4 strips of fabric to the same length as called for cutting the webbing. They could be cut a few inches longer if you would like to be able to slip the straps over your head, for a diagonal-neck-to-hip strap style. I wanted the straps to be about 1.5 inches finished width, so I made the strips 2 inches wide to allow for seams and some bulking up with the padding. If they are made too wide, the cinching won’t work as well.
- Cut strips of a material for padding the same length as the straps, but 3/4 inch narrower. You don’t want to be unnecessarily sewing through all the layers of padding when putting the straps together. I used 2 layers of some left-over quilt batting, but I have used old mattress pads for the same thing for other projects.
- Center the padding in the center of 2 strap pieces, lengthwise. Pin in place, then baste into place very close to both long edges of the padding. This will obviously show on the outside. That will not be a problem if the padded strap piece is used as the inside of the strap, or the thread blends adequately with the colors of the strap fabric. It can also be used as a guide for the edge stitching when sewing the other strap piece on.
- Fold in long edges of all strap pieces 1/4 inch and press.
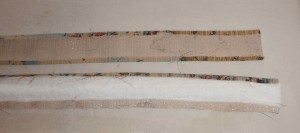
the pieces for one strap almost ready for assembly, just before the last long edge of the padded strap piece is folded and pressed - Pin the long, folded edge of one padded strap piece to one unpadded strap piece, wrong sides together. Top stitch them together, about 1/8 inch from the edges, keeping the edges even. Repeat for the other strap.
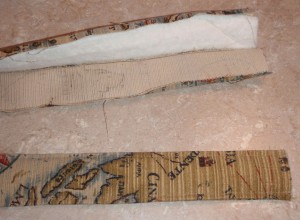
- Making adjustments to the folded edge of the unpadded strap piece as needed to keep the edges even, sew together the other long edge of the strap. Repeat for the other strap.
- Trim away any padding that is extending beyond the end of the straps. Slip the straps through the strap casing, as instructed in the book. Overlap the ends of the strap and sew together, going back and forth several times. Make sure the straps are flat all the way around the circle. I used a medium zig-zag stitch to create a box stitching pattern, to make sure it was strong.
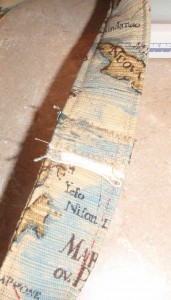
I searched through all my fabric for a coordinating cotton for the casing, but had a hard time finding something that looked right with the colors in the antique map printed decorator fabric. So, I went ahead and used the same fabric for the casing. It looks good, but I am concerned that the straps don’t slip as easily through the thicker, textured fabric, so it might not close well without extra help. Also, the casing seems to resist gathering up more than a cotton would. Next time, I will try harder to find a thinner fabric for the casing, especially if I want to make the bag larger.
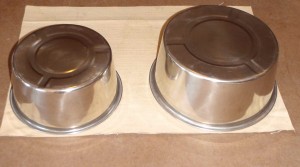
I pulled out a couple of different sized bowls to get a look at how they affected the degree of curve for the bottom of the bag. I was surprised to find that the larger bowl resulted in more curve. I didn’t want to mark on the right side of the fabric, partly because I thought it would be hard to draw on the texture. Besides, it would be easier to see the line on the unprinted side of the cloth. My mistake was not keeping track of the directional design when I turned the fabric over. I ended up cutting the first corners out such that the continents would have all been upside down! People would fall off! 😉 Fortunately, I still had plenty of fabric left, so cut out new pieces.
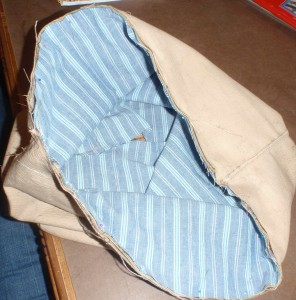
Sewing the body and lining of this bag together is very straightforward. I should have taken time to add at least one pocket to the lining, but now I know and can make a note in the book. I did add the step of top stitching along the bottom seam. I think it adds strength and helps it hold its shape better. (I always zig-zag just inside the original seam, too, for more strength).
I’m already planning on making a couple of these, but larger. I do like the way it pulls closed, but is not quite as much trouble as a more complete closure, for those times when speed of access is more useful. A larger version should be handy for carrying clothing to the gym; or it could be a chic reusable shopping bag. A zipper pocket inside for valuables or smaller items would be just the thing. And so I continue on my search for the perfect bag for every occasion!
