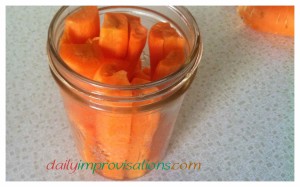
Knowing how you are going to be able to store your garden carrots for the winter can be useful for planning how many and what types of carrots to plant. I have a friend who really enjoys her carrots and has experimented with many types of winter storage and carrot varieties. She recently told me about what she considers to be the easiest, least labor intensive way to store them, as well as which kind of carrot she has found to be most reliable over her many years of growing carrots.
First, the variety. She definitely likes the Bolero carrot seeds, that she buys from Johnny’s Selected Seeds. They have produced large, flavorful carrots without fail. They are particularly sold as a storage carrot. She also plants a few early carrots, like the Nelson variety, but only enough to eat early in the garden season. In case you are wondering, she eats carrots raw and cooked all the time. She puts them in her husband’s lunches. I was given a sample from some cut up in her refrigerator and they were quite tasty. These were from last year’s planting and the winter storage method I am going to describe to you.
My friend told me that she has tried just about every idea for storing unprocessed carrots through the winter. As a root crop, there was the potential to store them without drying, freezing, or canning. But they ran into complications. For example, a large bin layered with sand and carrots, collected water in the lower levels and carrots rotted, even with holes down the sides of the bin for aeration. Keeping the carrots moist enough so that they don’t shrivel, but not so moist that they rot proved tricky. They liked the idea of storing the carrots in the ground, but struggled to find a way to cover them enough so that the ground didn’t freeze, but the cover was easy enough to move when it was time to get more carrots. At one point they tried straw bales, when they lived in Colorado and the freezing seemed impossible to prevent, but that meant that digging winter carrots was a major workout.
Here in Idaho, where it doesn’t freeze quite so deeply (but still gets down to subzero° F for a spell), they have finally discovered what they consider to be a cost effective, labor efficient way to insulate the carrots in the ground. All it takes is
- a tarp, large enough that it can be folded double over the row, or two tarps
- some regular fiberglass insulation
- a few logs, boards or rocks, and
- something semi-light weight, like a garden hose, to spread over the top of things
- some plastic sheeting
Her raised beds are only about 6 inches tall, so she cautioned that higher raised beds might have more trouble with freezing, but here is how they stack things up:
1. Put a layer or two of plastic sheeting over the raised bed. This is just for a bit more insulation.
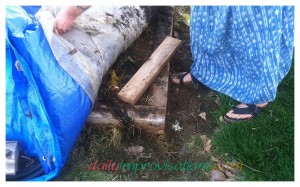
2. Lay one thickness of tarp over the plastic.
3. Place a couple layers of fiber glass insulation on the tarp, so that the insulation is covering the whole area or raised bed. If the raised bed is higher, you might want the tarp/insulation combo to go all the way over the sides of the raised bed.
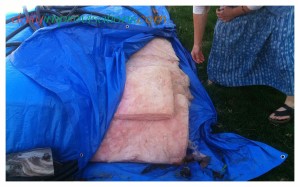
4. Pull the other half of the folded tarp, or the other tarp, over the insulation.
5. Roll the long edges of the tarp(s) onto a relatively heavy fence post or long board, to keep things in place.
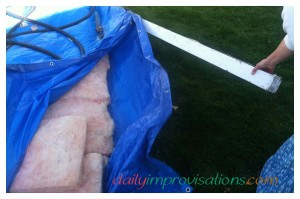
6. Put something of moderate weight, like the loose hose, over the top of the tarps, to keep it from catching wind during winter storms.
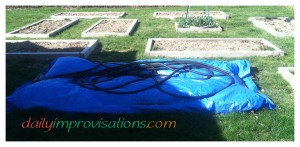
7. Go out when you want to dig some carrots and unroll one edge of the tarp at least partially off of the long board; then, easily pull aside a section of your tarp/insulation/plastic stack, then put it all back when you are done.
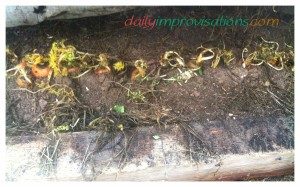
When my friend digs carrots, she digs enough for a couple weeks. She rinses them just enough to get the muck off, then stores them in a refrigerator drawer in a thin produce bag from the grocery store. Then, she washes them more thoroughly when preparing them for eating. She plants about 3 small raised beds of carrots to get her family of 4 through the winter. When I saw how easy it was to get under her tarp to get to her carrots, I was inspired to plant more carrots myself this year. When she mentioned that sometimes she steams them, then covers them with a honey-butter sauce, I knew I needed more carrots in the middle of winter!

She is digging the last of last year’s carrots this April. As long as the green tops haven’t started growing yet, she says the flavor is good. She might go ahead and dry some, but they have eaten about 90% of them. The insulation is only barely wet around the very edges after all winter between the tarps. They will throw it out and get new insulation for this year’s cover, when they put it on in the late fall. Her husband works in the construction industry, where he always has a supply of insulation scraps to gather.
When I told my husband about this method, we were talking about how we might keep the insulation dry, since otherwise we would have to buy it every year. He mentioned some waterproof foam that we have left over from our swimming pool project. It might last more than one year, since it is supposed to be waterproof. I’ll keep you posted on how my winter carrot storage morphs after learning all these helpful insights from my friend!
