(Some links in this article are affiliate links, including Amazon links, from which I may make a small commission at no extra cost to you.)
My sourdough starter was losing potency, even though the method I describe in Basic Sourdough Bread Making for Ordinary People Part One had worked for several years.
Basic Sourdough Bread Making for Ordinary People Part One
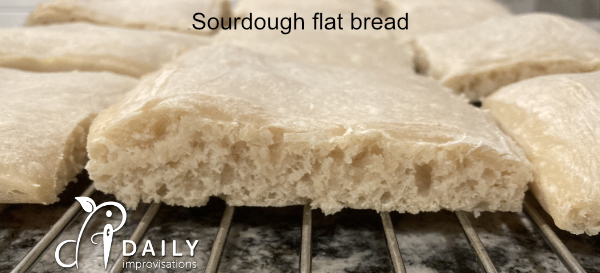
So I read up about bringing life to it in The Art of Baking with Natural Yeast. However, after about a week of refreshing it everyday on the countertop, it seemed more active. I verified this by making some of my basic flatbread. Then I decided to follow the book’s schedule of refreshing the starter twice a week.

The trouble with doing this twice a week is all the sourdough discard and I hate to throw it away. So, I began to research ways to use the discard. One friend had mentioned sourdough discard crackers, so I made those a few times. They are great right out of the oven and a satisfying snack for a couple of days, but not much good after that.
Next I tried sourdough pancakes. I tried three different recipes until I combined what I had learned with another recipe that used sour raw milk and my standby pancake recipe. That was definitely a success.

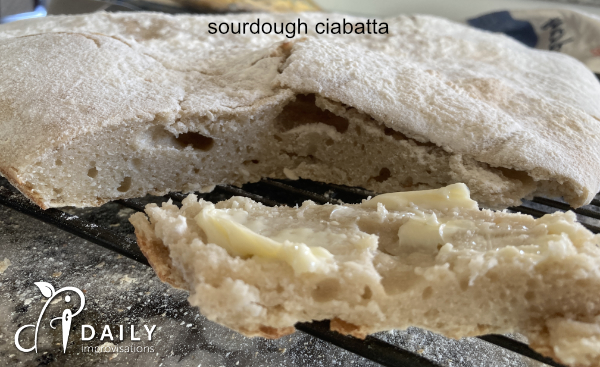
After that, I made ciabatta with just the discard. No added yeast. Just added salt. That was so tasty. And that is where things stood when we were asked to bring French bread to a dinner.

I reviewed the recipe for French baguettes in Suzanne Dunaway’s book No Need to Knead. I thought about the ratio of flour to water in my sourdough starter. Then I measured how much sourdough discard I currently had. Some of the discard was about two weeks old. Some was only a week old. All total, I had just shy of 4.5 cups of sour dough discard.
I estimated that represented close to the 2 cups of water called for in the French baguette recipe, but I needed to dissolve the two tablespoons of yeast in plain water, so I just went ahead and did that in half a cup of lukewarm water. I stirred it in gently with a wooden spoon and let it sit for a few minutes while I put the sourdough starter in a large bowl for mixing everything together. (I have an older 25 cup Tupperware bowl like the one linked to here: large plastic bowl)
At this point I added 3 teaspoons of sea salt to the big bowl of sourdough discard, per the French baguette recipe. After stirring this some with my new favorite kitchen tool, my Danish dough whisk, I added the yeast-water concoction. Finally, I added 1 cup of all-purpose flour and thus began the process of gradually adding just enough flour until the dough barely cleaned the sides of the bowl. To clarify, this meant that I kept adding smaller and smaller amounts of flour at a time so that I could keep the dough as moist as possible. Also, I switched to stirring with a sturdy wooden spoon.
Let me emphasize that I kept the dough very soft. This method does not require kneading and the softness of the dough has a lot to do with getting best results.
Now what I needed to do was to let it rise for 30-40 minutes in a warm place. Since it was a damp, cold fall day, I used the old trick of turning the oven on for 90 SECONDS, then turning it OFF before I put the bowl in. My 25 cup Tupperware bowl has a lid it came with, so I simply set the lid on the bowl (not snapping it on tightly) when I placed the bowl in the now OFF, though very slightly warm, oven.
Since I was on a restricted schedule to get to dinner on time, I got the bowl out at the 30 minute mark to do the folding within the bowl. I alternately reached partly under the glob of dough on what you might call the four points of the compass, folding over each side. That’s all. Then I put it back in the oven again to rise again.
The original recipe in Dunaway’s book says letting the dough rise three times is to “develop the flavor,” however since I was already using sourdough discard and had had such good results with the ciabatta, I thought there was a good chance I already had good flavor. Plus, as I mentioned, I had limited time. I only let it rise this second time before proceeding on to shaping the loaves.
From here I followed the directions, except that I didn’t really have time to let the dough rest the 15 minutes. That is, I put a generous layer of flour on my bread making counter. I used a rubber spatula to ease my bread dough onto this counter. I used a table knife to gently cut it into two equal pieces. And I paced a bit before sprinkling flour onto the top of each piece of dough.
The recipe said to roll “as you would roll soft clay.” I think my dough was softer than this. I barely applied any pressure, but thankfully the dough assumed the log shape in a matter of seconds. I had already greased a half-sheet pan, so could now put the two long rounds of dough on the half-sheet pan. They were about two inches from each other and two inches from each side of the pan.
Because the dough was so soft, I didn’t want to put any pressure on it to score with the sharp paring knife. I barely got any lines, but left it at that. And it was time to let it rise again, only this time I needed to let it sit on the counter so I could preheat the oven.
I preheated the over to 450 °F right away, because I was hoping the bread dough would be ready to bake in 30 minutes. I also put water in a 9 by 13 inch baking dish and placed it on the lower oven rack.
Happily, the dough did rise well in that 30 minutes. I managed to find a kitchen spray bottle and lightly spritzed the tops of the loaves just before putting them in the oven. Right after putting them in the oven, I lowered the oven temperature to 400 °F, as the recipe said.
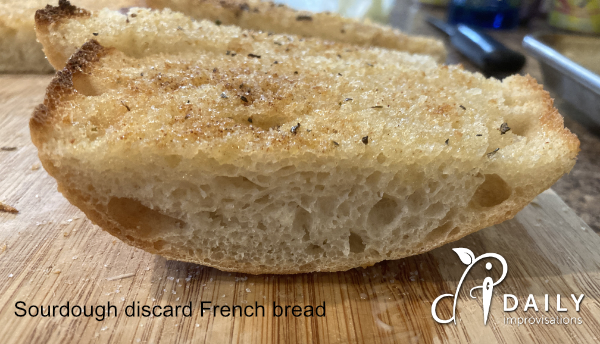
The loaves were a golden honey brown in 30 minutes. They had expanded during baking so that the middles were barely connected.
We took the pan straight from the oven and drove to our dinner destination. The drive took about 35 minutes. Once there, my husband sliced each loaf lengthwise to spread butter and sprinkle garlic powder, salt, paprika, and a touch of dried, crushed basil. The paprika and basil were more for color than anything.
But I had to taste the bread plain first! I sliced off an end and put some butter on it. It. was. so. good.
I never have more than one piece of bread with dinner, but I had three pieces of bread with dinner that night. Everyone raved about the bread, even the young children. Two people asked for the recipe. I knew I needed to remember what I had done. And now you know, too.

In summary, here is a list of ingredients:
- 4.5 or so cups of sourdough discard
- ½ cup lukewarm water
- 2 Tablespoons of yeast (I used instant yeast that I’ve been storing in my freezer for months)
- 3 teaspoons of sea salt
- as much all-purpose flour as needed to get dough to softly form (I ended up using about 3 more cups, but it will depend on the consistency of your sourdough discard and your humidity)
- water for spritzing
- something to grease the half-sheet pan (I use Crisco, because I’m not always willing to spend my butter on greasing pans. I have never found plain oil to work well. I should probably investigate using lard)
Obviously, you could also halve this or even quarter it to make short, fat loaves. Also, I will probably use some freshly ground red wheat flour in the future for some of the flour that I add to form the soft dough. I hope you enjoy your sourdough discard French bread as much as we enjoyed ours!
